Photoshop制作惊艳大气的3D立体字

来源: Tutsplus.com 作者:Rose
先看看效果图

What You'll Be Creating
This tutorial will show you how to create and style a mixer brush tip, and adjust its settings to stroke a work path and create a simple 3D text effect. Let's get started!
1. How to Create Background and Text Layers
Step 1
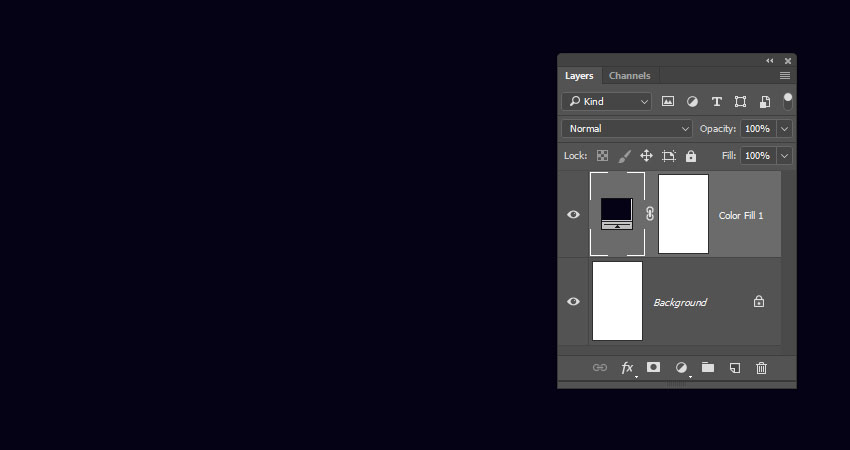
Create a new 1250 x 2000 px document, click the Create new fill or adjustment layer icon at the bottom of the Layers panel, choose Solid Color, and set the Color Fill to #040214.
Step 2
Add the Blue circle background image on top of the Solid Color layer, rename its layer to BG Texture, change its Opacity to 35%, and resize it as needed.

Step 3
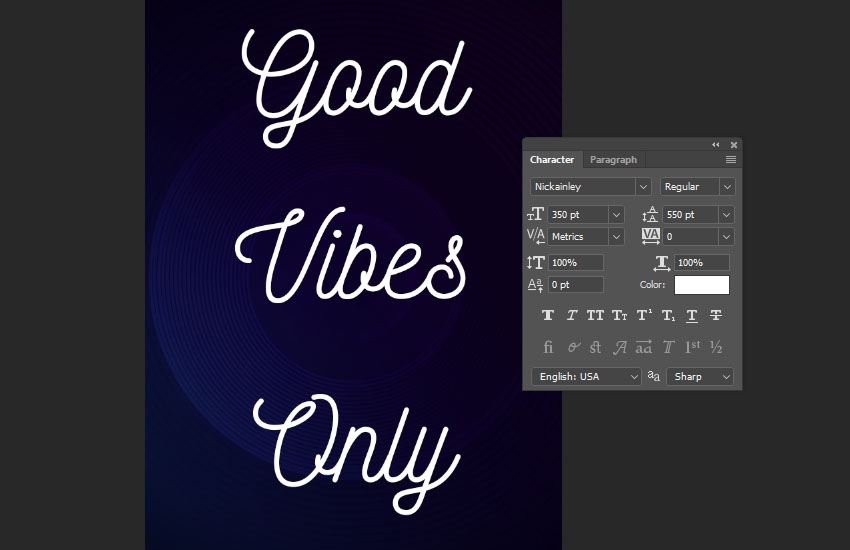
Create a reference text using any script font you like. The font used here is Nickainley, and the Size is set to 350 pt.
If you have more than one line of text, make sure to change the Leading value to one you like. Here, it is set to 550 pt.
2. How to Create and Style a Mixer Brush Tip
Step 1
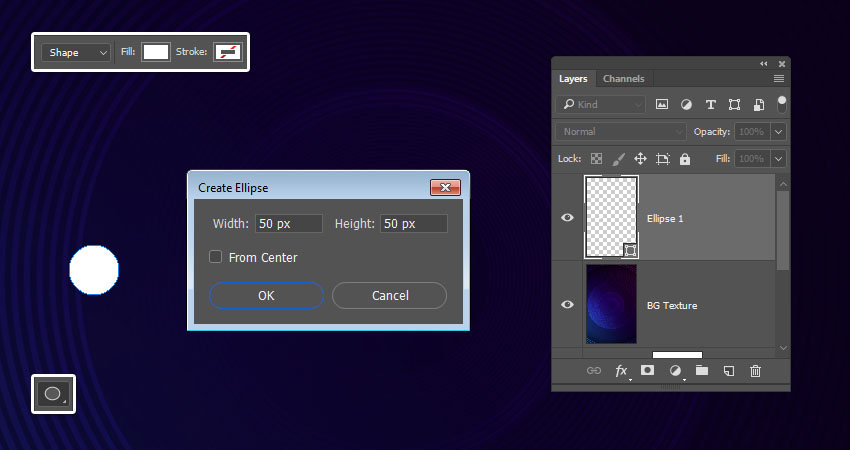
Pick the Ellipse Tool, make sure that the Shape option in the Options bar is active, and click anywhere inside the document to get the Create Ellipse box.
Set the Width and Height values to 50 px, and click OK.
Double-click the Ellipse layer to apply the following layer style:
Step 2
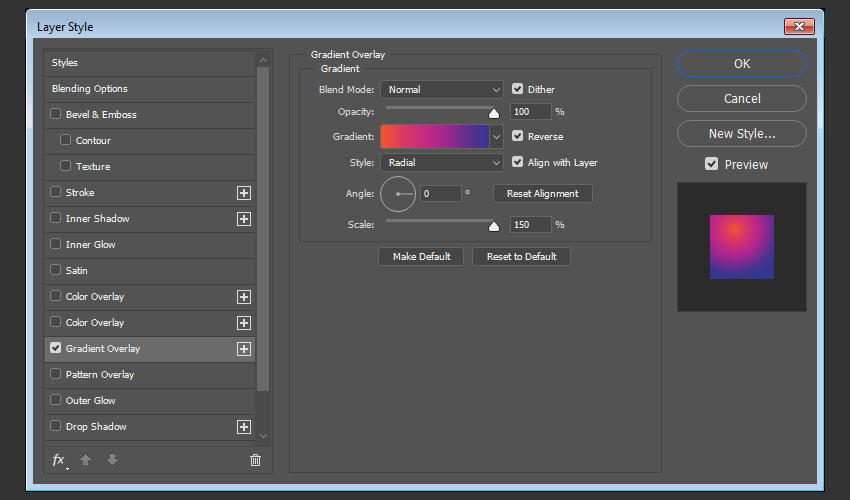
Add a Gradient Overlay with these settings:
Check the Dither box
Style: Radial
Angle: 0
Scale: 150%
Check the Reverse box if needed.
Click the Gradient box to create the gradient using the Colors #35378e to the left, #b62789 in the center, and #f15332 to the left.
You can use any other colors you like for the gradient to get different outcomes.
Step 3
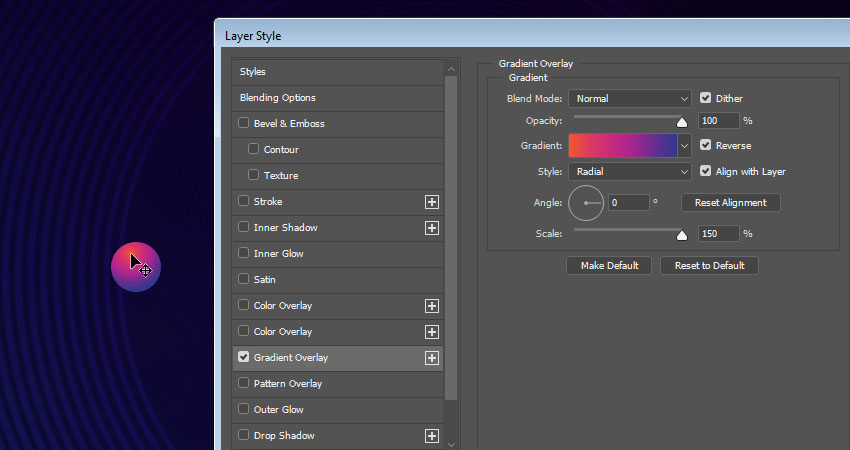
We need to move the gradient to the top of the ellipse. To do so, click-drag the gradient fill inside the ellipse.
Step 4
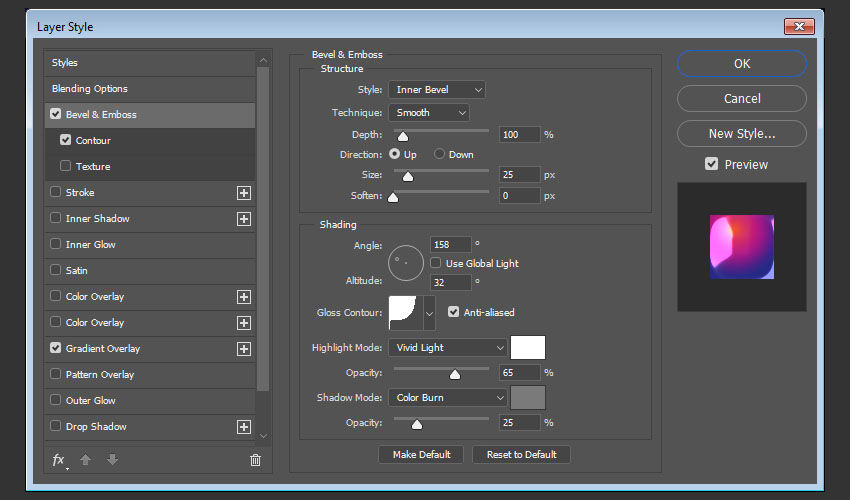
Add a Bevel and Emboss with these settings:
Size: 25
Uncheck the Use Global Light box
Angle: 158
Altitude: 32
Gloss Contour: Cove - Deep
Check the Anti-aliased box
Highlight Mode: Vivid Light
Opacity: 65%
Shadow Mode: Color Burn
Color: #7a7a7a
Opacity: 25%
Step 5
Add a Contour with these settings:
Contour: Cone - Inverted
Check the Anti-aliased box.
Range: 100%
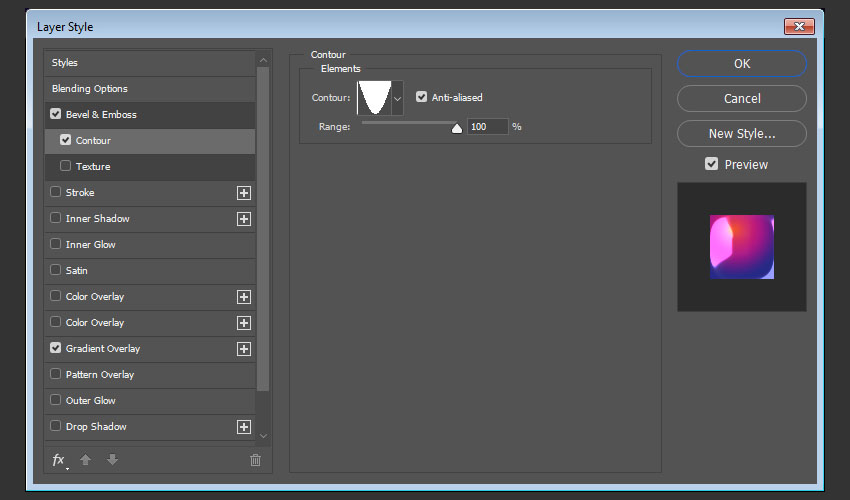
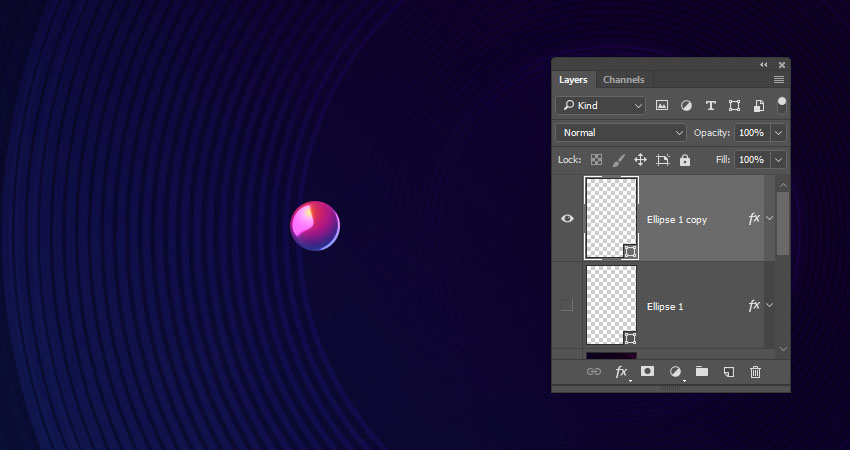
This will create the styled tip that we will use for the Mixer Brush Tool later.
Step 6
Since the styled shape needs to be rasterized to be used for the Mixer Brush, you can duplicate its layer first to keep a copy, hide it, and right-click the copy to choose Rasterize Layer Style.

3. How to Create a Text Work Path
Step 1
Pick the Pen Tool and choose the Path option in the Options bar.
Click to add anchor points, and click-drag to create curves.

Step 2
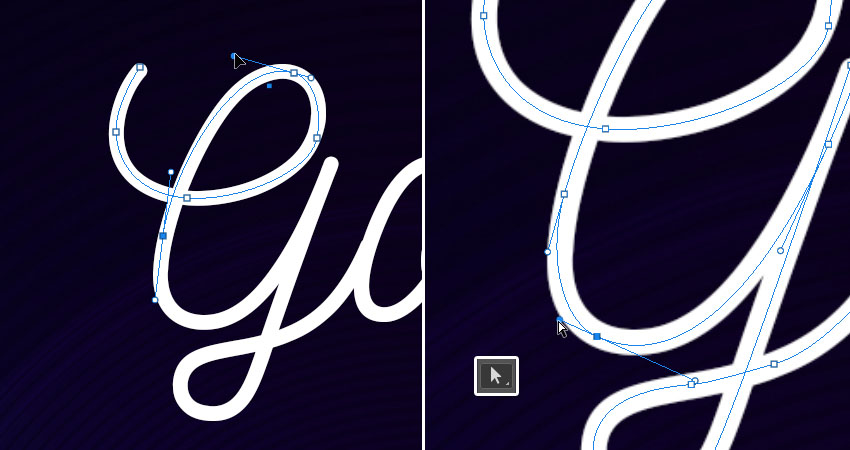
While you're creating the path, you can press-hold the Command key to temporarily select and adjust the anchor points and their direction lines and points.
Another way to do that would be by using the Direct Selection Tool (A) instead.
When you finish creating a letter's work path, Command-click anywhere outside it.
Step 3
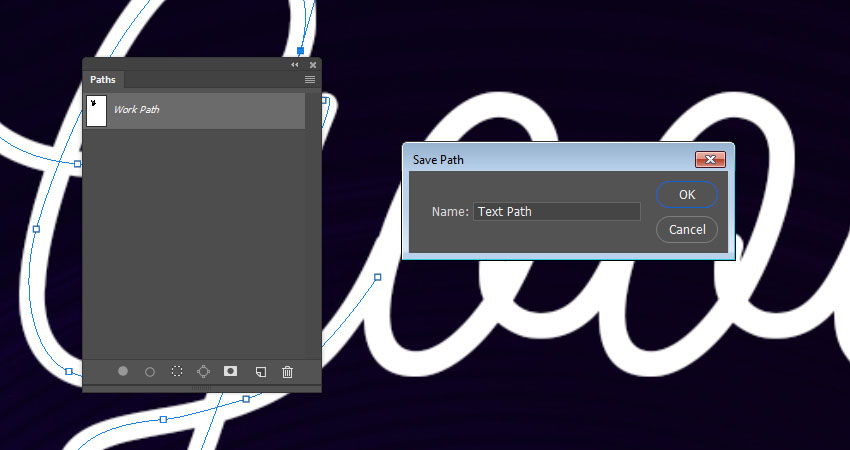
In the Paths panel, double-click the Work Path tab and enter a name for your path to save it.
Step 4
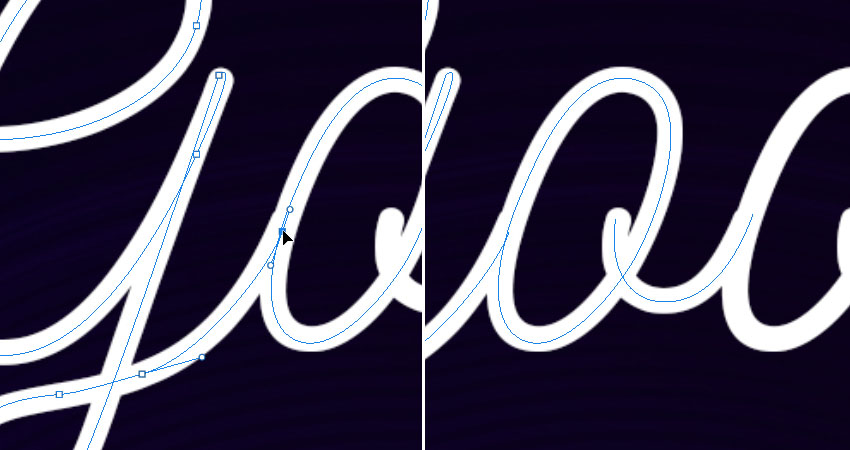
It is better to separate the paths where needed, so that you can edit them easily after stroking them.
Make sure to align the paths so that they fall nicely on top of each other where they are supposed to overlap.
4. How to Adjust the Mixer Brush Tool's Settings
Step 1
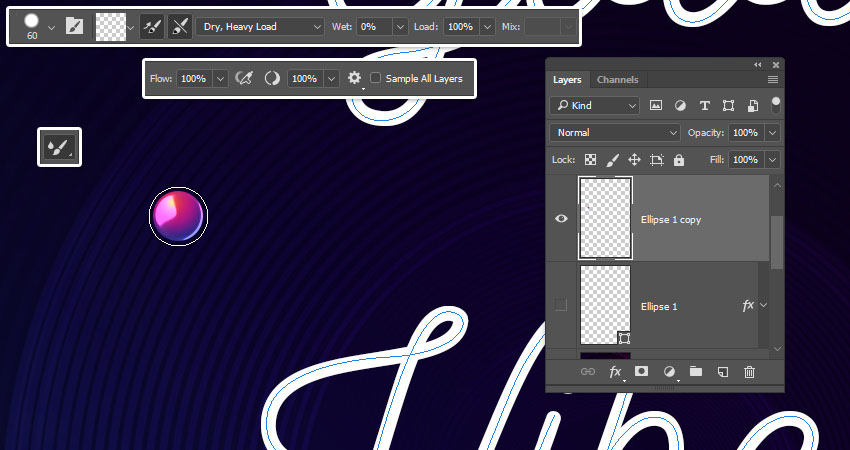
Pick the Mixer Brush Tool (click and hold the standard Brush Tool to reveal it), and use these settings in the Options bar:
Click the Load the brush after each stroke icon.
Click the Clean the brush after each stroke icon.
Choose the Dry, Heavy Load preset from the Useful mixer brush combinations list.
Wet: 0%
Load: 100%
Flow: 100%
Stroke Smoothing: 100%
Uncheck the Sample All Layers box.
Once you adjust the settings, change the tip's Size to 10 px more than the styled ellipse's Size, so here the brush tip's Size is set to 60 px.
Step 2
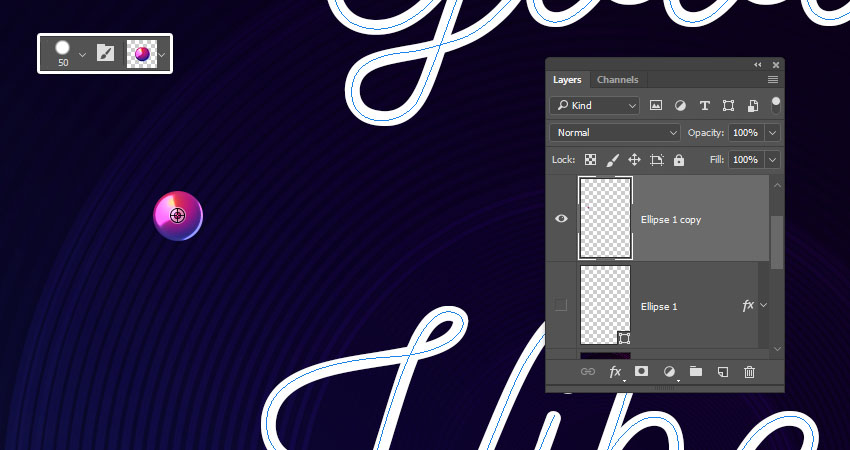
Select the styled ellipse's layer, place the cursor in the center of the styled ellipse, press-hold the Optionkey, and click to load the ellipse into the brush tip.
5. How to Stroke a Work Path Using the Mixer Brush Tool
Step 1
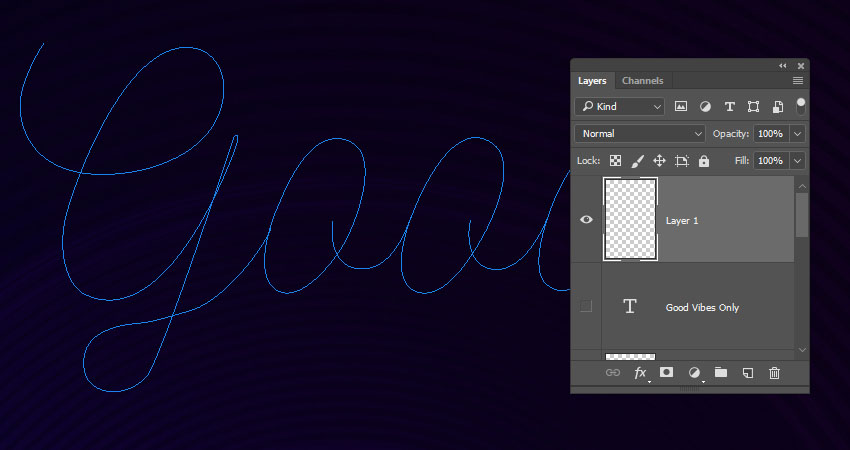
Hide the original text layer and create a new layer on top of it.
Step 2
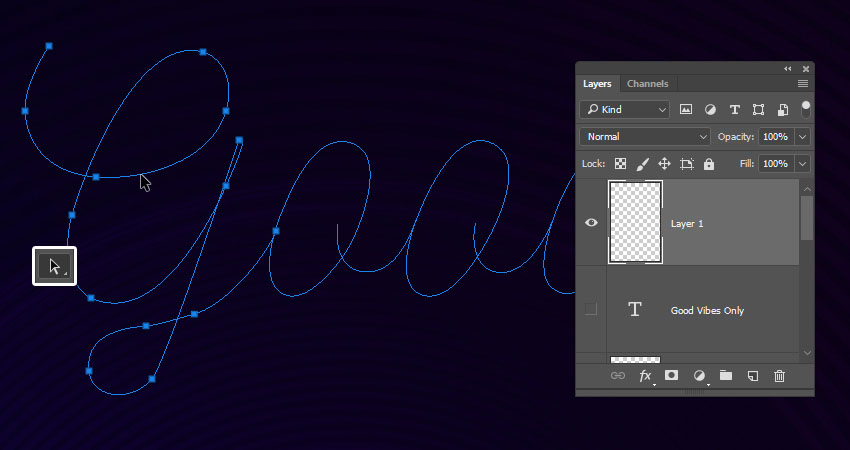
Pick the Path Selection Tool, click outside all paths to make sure none of them are selected, and then click the first letter's path you want to stroke.
Step 3
Hit the Return key to stroke the path, create a new layer, select the next path, and stroke it on the new layer.
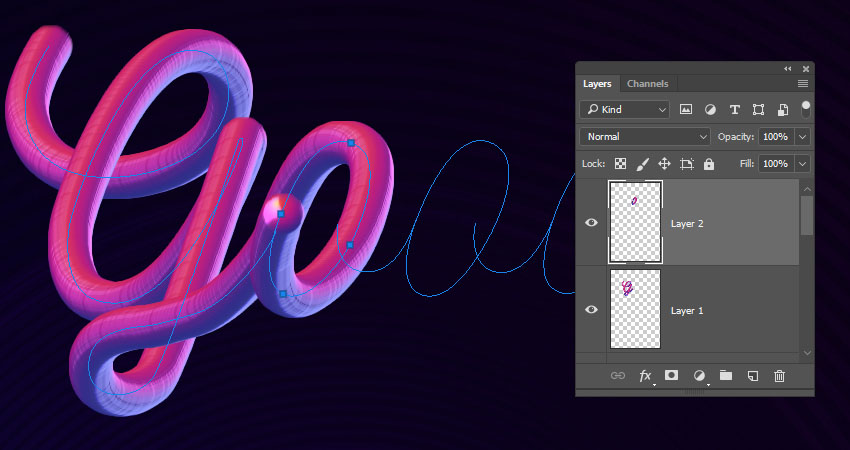
Step 4
Continue selecting the paths and stroking them on separate layers until you're done with the first word.
Place all the word's layers in a group to keep things organized.
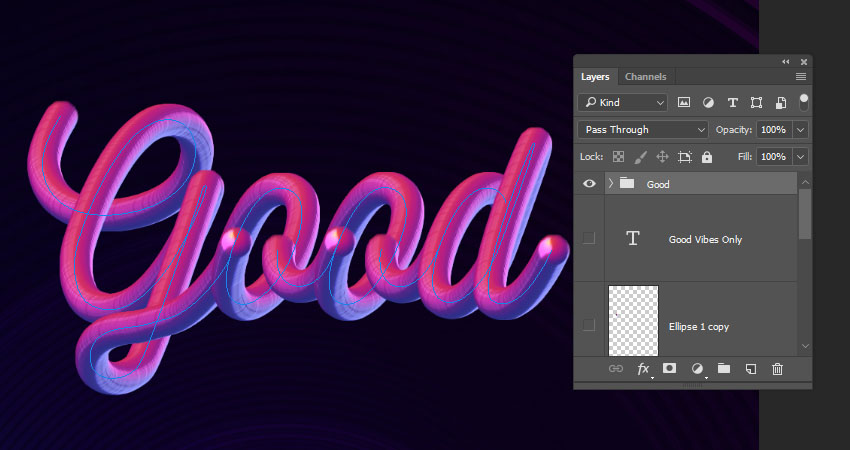
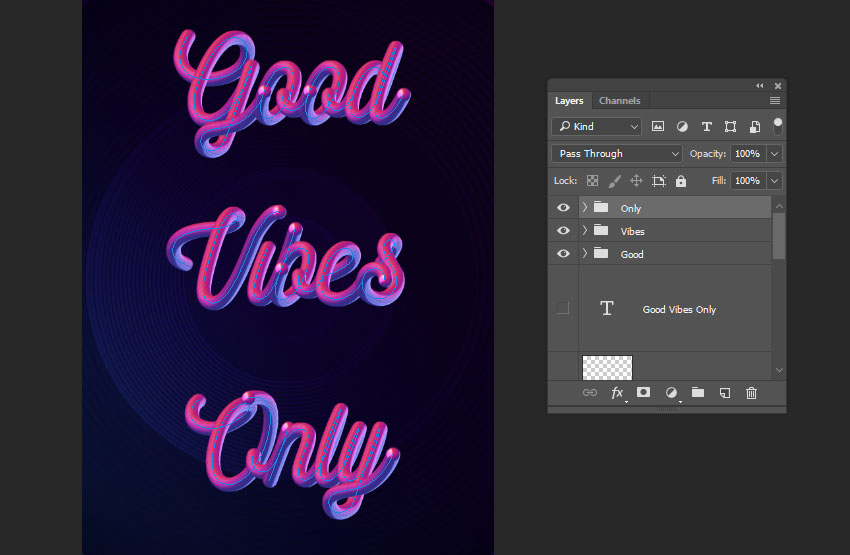
Step 5
Finish stroking all the words you have to start adjusting the final effect.
6. How to Get Rid of Unwanted Path Ends
Step 1
For some letters, the path ends might not be necessary, such as the O letters.
To fix that, you need to change the path's starting and end points, either by recreating the path or by flipping it.
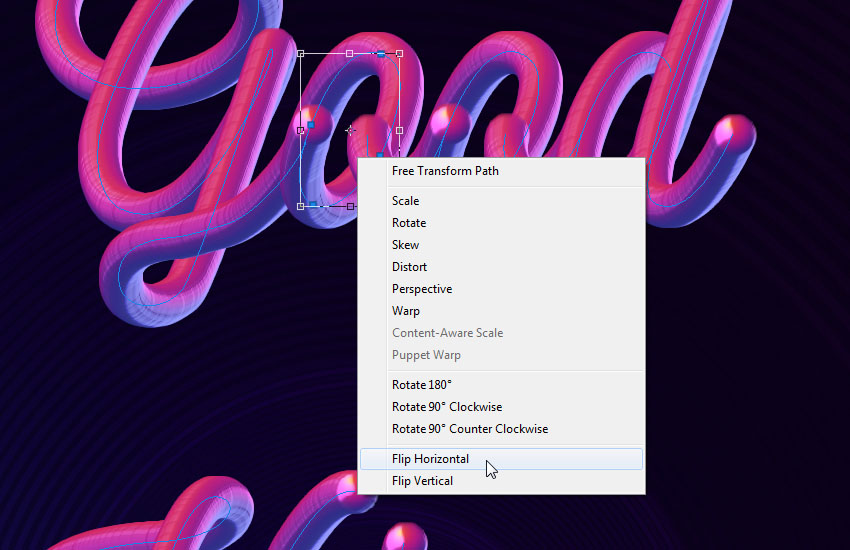
To flip a path, use the Path Selection Tool to select it, and press Command-T to enter the Free Transform Mode.
Right-click the bounding box and choose Flip Horizontal, and right-click it again to choose Flip Vertical.
Hit the Return key to commit the changes.
Step 2
Create a new layer on top of the original stroked path layer, and stroke the transformed path.
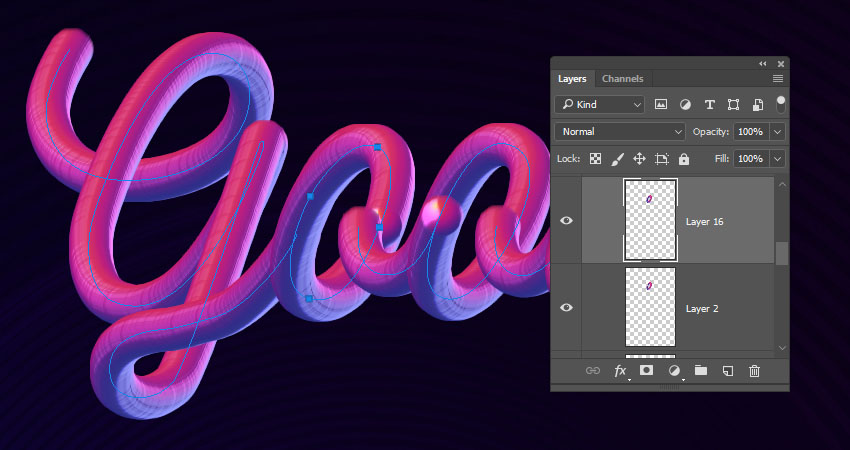
Step 3
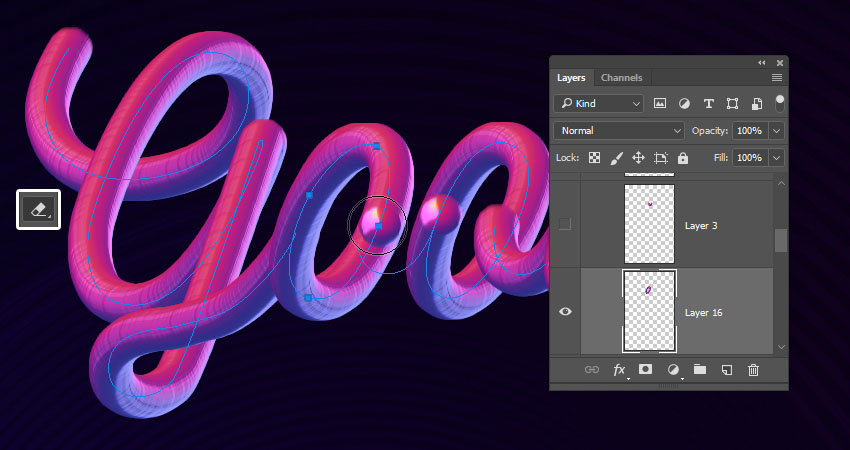
Then, pick the Eraser Tool, and erase the end of the new stroked path.
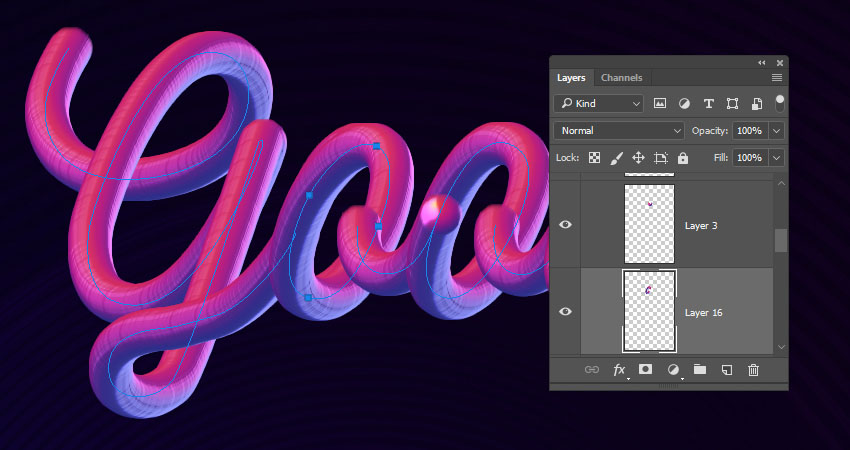
You can temporarily hide any layers on top of the one you're working on to see things clearly.
If the flipping method doesn't create a result you like, you can recreate the original path but with different starting and end points.
Step 4
Repeat the steps to fix any other path ends you don't like.
7. How to Reverse a Path's Direction
Step 1
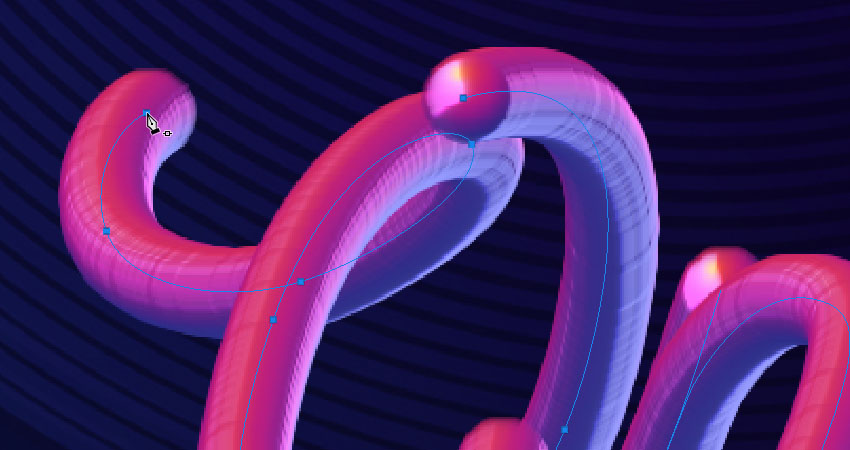
If you want to completely reverse an open path, pick the Pen Tool, and click the starting point of the path.
Step 2
Then, click the end point of the path to close it.

Step 3
Pick the Direct Selection Tool, click outside the path to unselect it, and click the segment that you created to close the original path (the one between the starting and end points).
Hit Delete to get rid of the selected segment. This will reverse the path's direction.
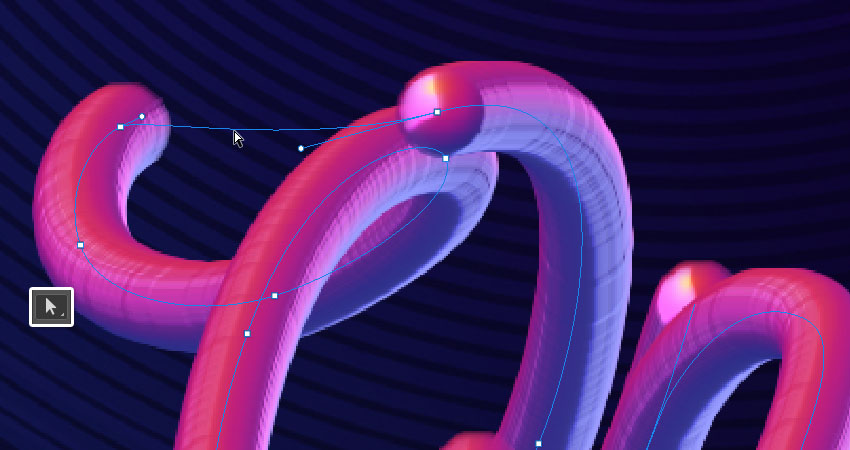
Step 4
Now use the Path Selection Tool to select the inverted path, and stroke it on a new layer.
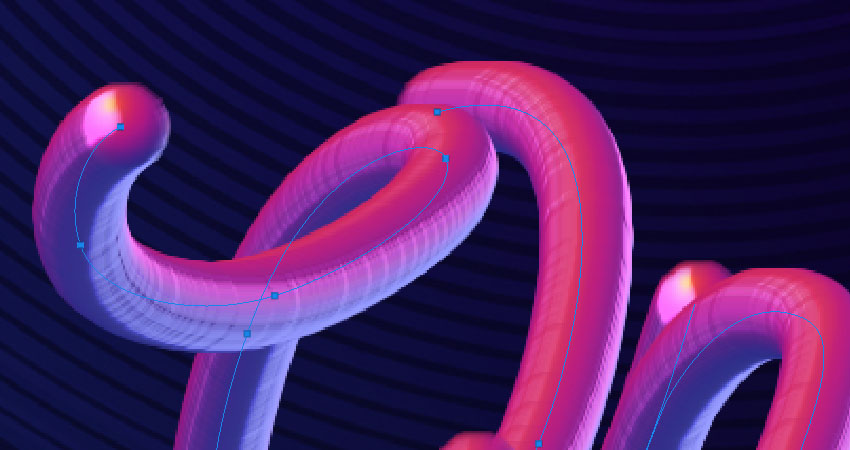
8. How to Smooth the Final Outcome
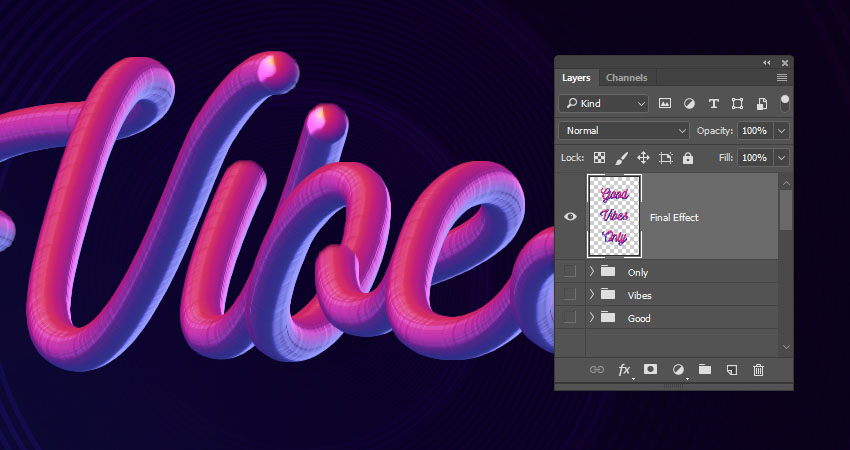
Step 1
Select all the text groups you have, duplicate them, press Command-E to merge the copies, and hide the original ones.
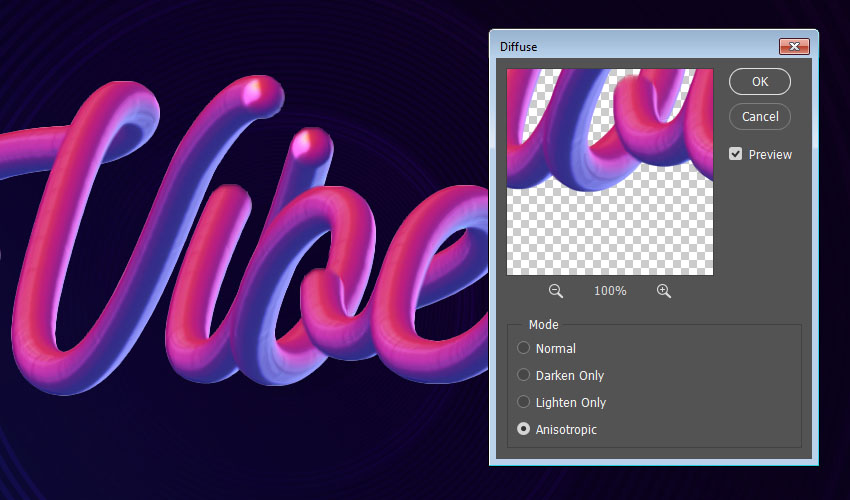
Step 2
Go to Filter > Stylize > Diffuse, and set the Mode to Anisotropic to get a smoother result.
Advertisement
Step 3
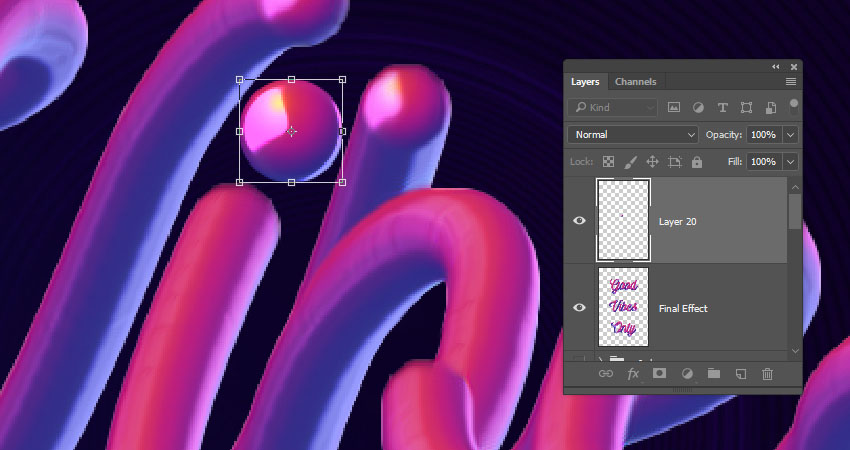
Add any extra dots or accents manually where needed, and make sure to do so on new layers so that you can transform them if you like, and then apply the Diffuse filter separately to them.
Congratulations! You're Done
In this tutorial, we created a simple background and a reference text layer. Then, we created an ellipse and styled it to create a mixer brush's tip. After that, we created a text work path and stroked the letters to create the text effect. Finally, we used a filter to smooth the final outcome.
Please feel free to leave your comments, suggestions, and outcomes below.


