Photoshop制作复古花朵组成的艺术字【英】
来源:Tutsplus 作者:Rose
Day of the Dead (Día de Muertos) is a Mexican holiday that celebrates the spirit and honors the memory of the friends and family members who have died. Marigold is the traditional flower used in the celebration of the Day of the Dead, as well as in the decoration of the Sugar Skulls, which are the most popular symbol of that day.
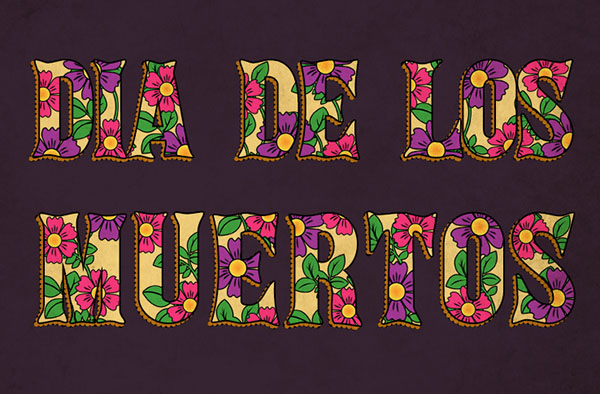
This tutorial will show you how to create simple marigold flowers, and use them with a couple of brushes, textures, layer styles, and shape settings, in order to create a Day of the Dead sugar skull-inspired text effect. Let's get started!
If you're interested in buying a graphic, vector, or template (to complement your work on the text effect), there's a useful collection of Day of the Dead items on GraphicRiver.
先看看效果图
1. Create the Basic Guidelines
Step 1
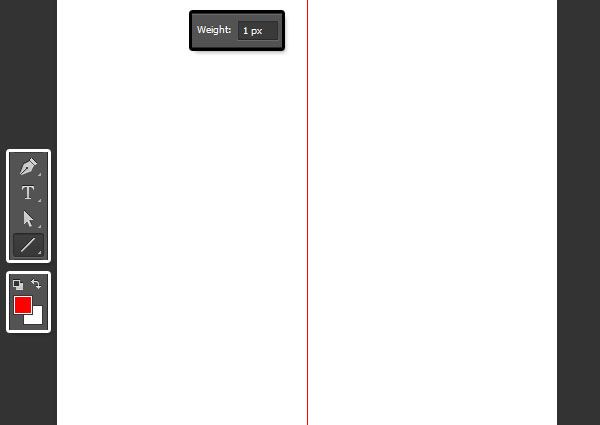
Create a new 500 x 500px document, and pick the Line Tool.
Set the Foreground color to Red, and in the Options bar, set the Weight to 1.
Create a vertical line in the center of the document, and extend it a little bit outside.
Step 2
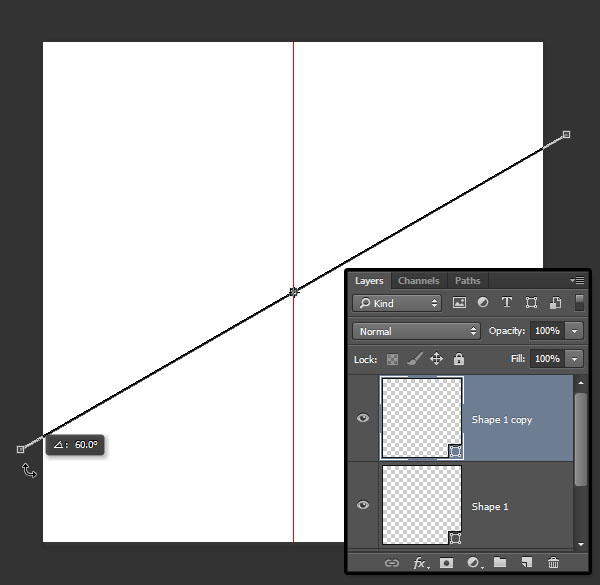
Duplicate the line shape layer, and rotate the copy line 60° counter-clockwise.
Step 3
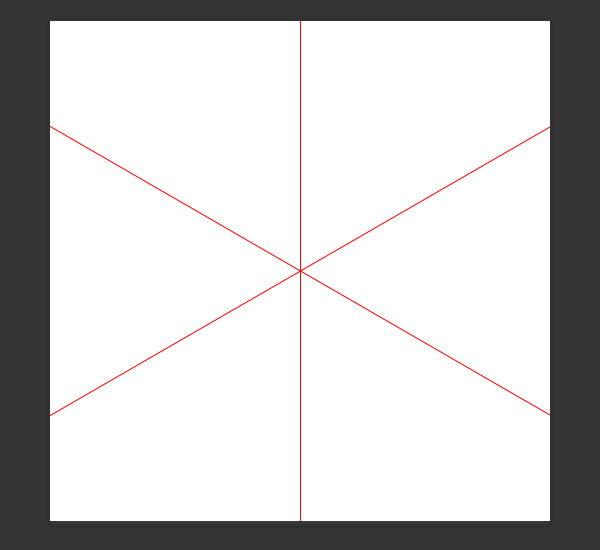
Duplicate the copy line and rotate the second copy another 60° counter-clockwise.
Step 4
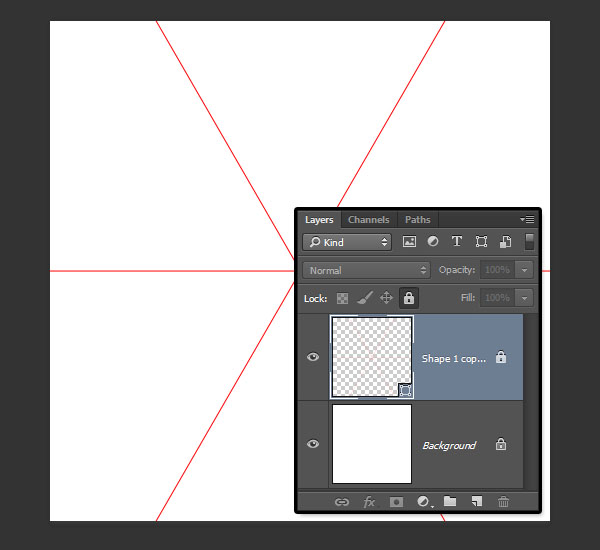
Select all the line shape layers, go to Layer > Merge Shapes, and rotate the merged shapes 30° clockwise. You can lock that layer if you like once you're done.
Step 5
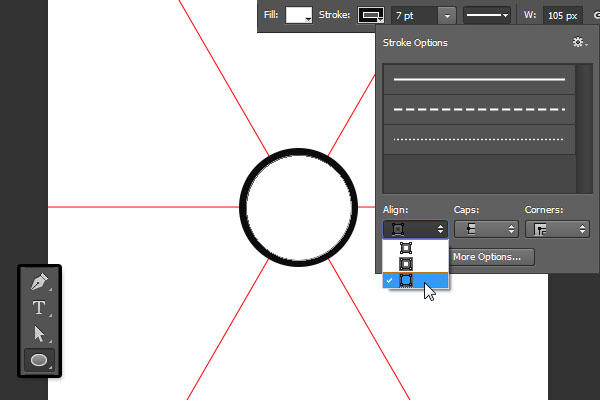
Pick the Ellipse Tool and create a 366 x 373 px ellipse in the center of the document.
In the Options bar, change the Fill Color to White, the Stroke Color to Black, and click the Set shape stroke type icon to change Align to Outside.
2. Create the Petals
Step 1
Pick the Pen Tool, choose the Shape option in the Options bar, and set the Fill Color to White, the Stroke Color to Black, and its Size to 7.
What you'll need to do next is create the basic petal shape.
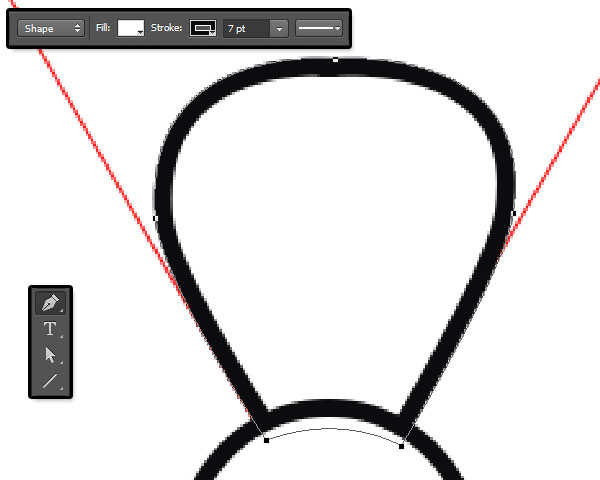
You can click once to add points, and click and drag to create curves. Use the shape below as a guide to how many anchor points you need and where they should be placed.
Don't worry about making the shape perfect, as we'll work on that in the next step.
Step 2
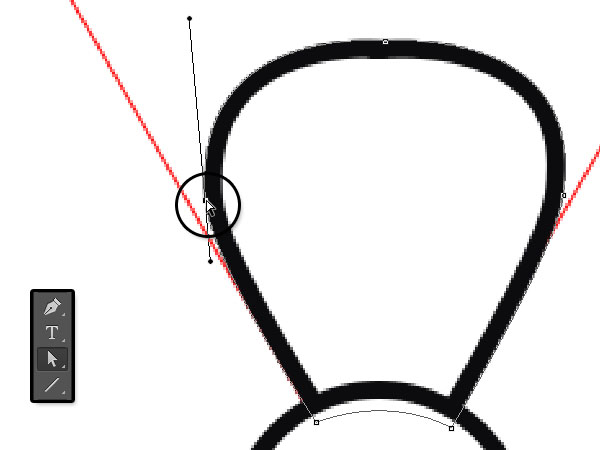
Once you create the basic shape, you can pick the Direct Selection Tool, and click-drag the anchor points to change their position.
Step 3
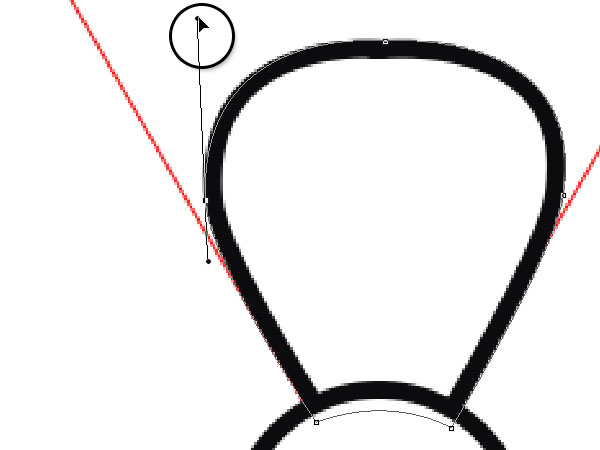
You can also click and move the handles at both ends of the anchor point to change the curve's shape.
Take some time to work on the petal shape until you like the result you get.
Step 4
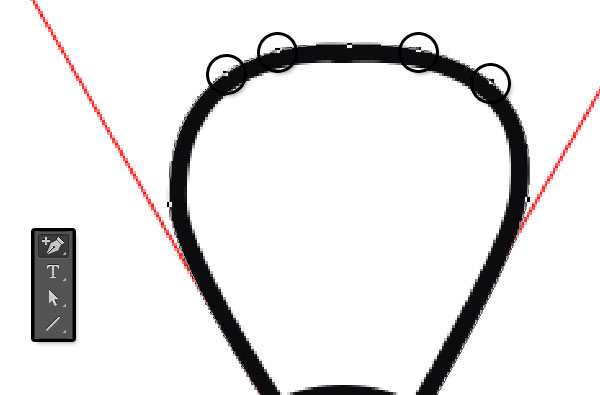
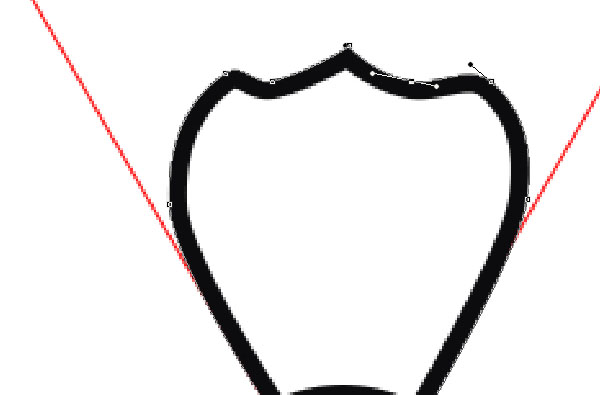
Pick the Add Anchor Point Tool, and add four anchor points as shown below.
Step 5
Pick the Direct Selection Tool, and click and drag each of the second and fourth anchor points down, changing their shape as you like to create the jagged edges of the petal.
Step 6
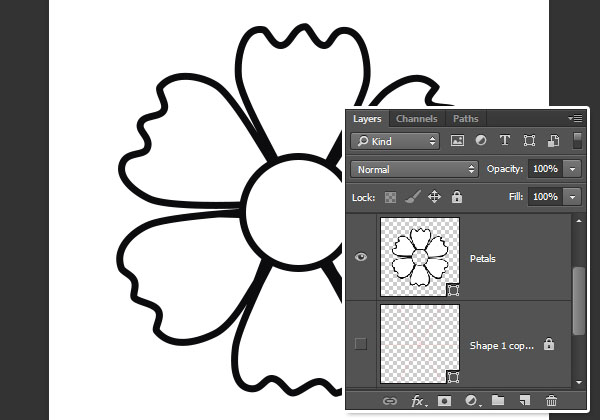
Once you're done with the first petal, you can duplicate, rotate, and modify it to make the rest of the petals.
When you have all the petals ready, select all their layers, and go to Layer > Merge Shapes to place them all in one shape layer. Call it Petals.
3. Create the Inner Lines
Step 1
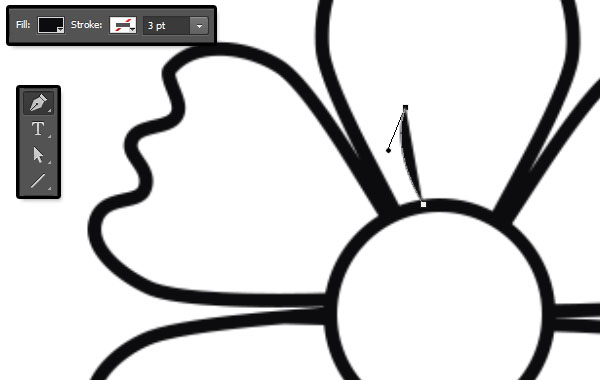
Pick the Pen Tool again, and set the Fill Color to Black and the Stroke to None.
Create the lines using simple two-point curves. So click once where you want the line to begin, and then click-drag where you want it to end. The more curved the line is, the thicker it will appear.
Press the Esc key after creating each line to create another new separate one.
Step 2
Merge all the line shape layers in one layer and call it Lines.

4. Color and Style the Flower
Step 1
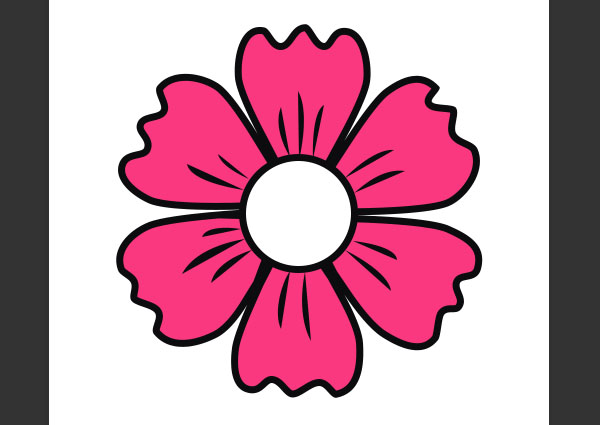
Double-click the petals shape layer's thumbnail to fill it with any color you like. Here, the color used is #fa387f.
Step 2
Double-click the Lines shape layer to apply a Drop Shadow effect using the following settings:
Opacity: 100%
Distance: 0
Size: 7
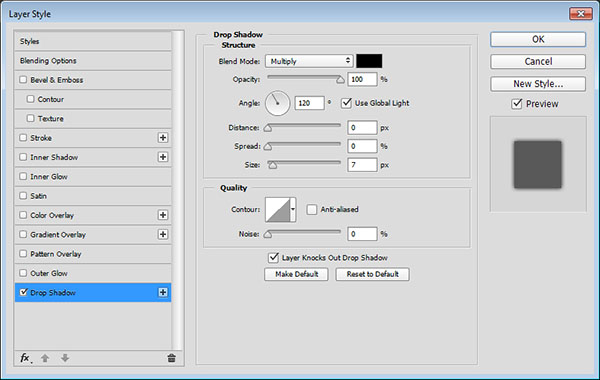
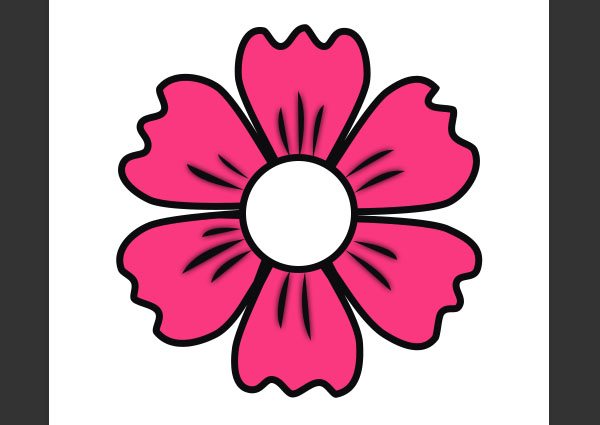
This will feather out the lines a little bit.
Step 3
Double-click the center ellipse shape layer to apply a Gradient Overlay effect using the following settings:
Style: Radial
Scale: 110%
Click the Gradient box to create the gradient using the colors #ff9b2c to the left and #ffe64a to the right.
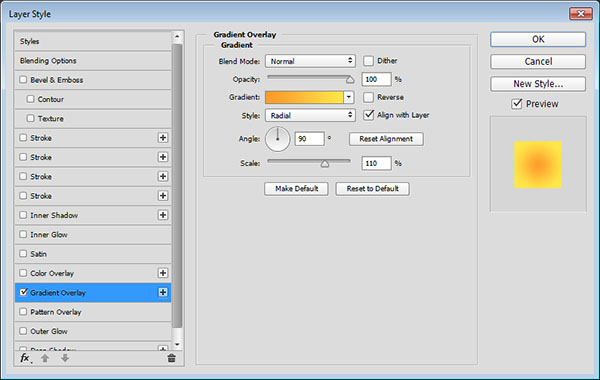
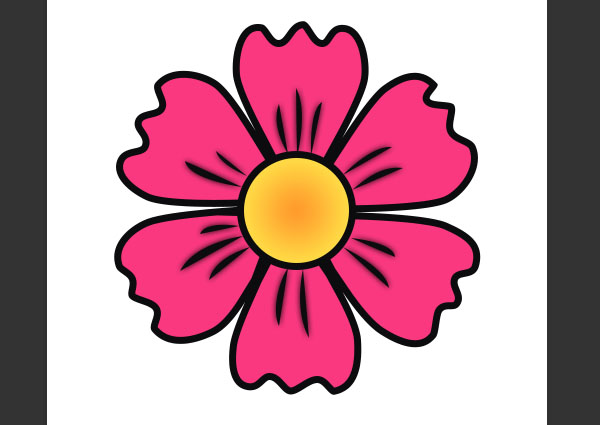
This will style the center.
5. Create the Raster Layers
Step 1
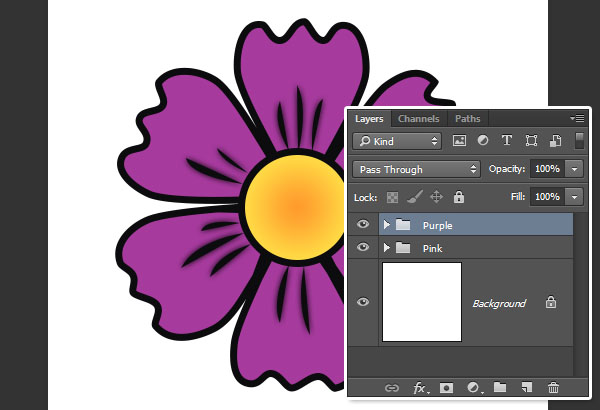
Group all the flower shape layers you have, and rename the group to the flower's color (Pink).
Duplicate the group and rename it to the other color you want to use (Purple), and then fill the Petals shape layer with that color. Here, the purple color used is #a63a9d.
Step 2
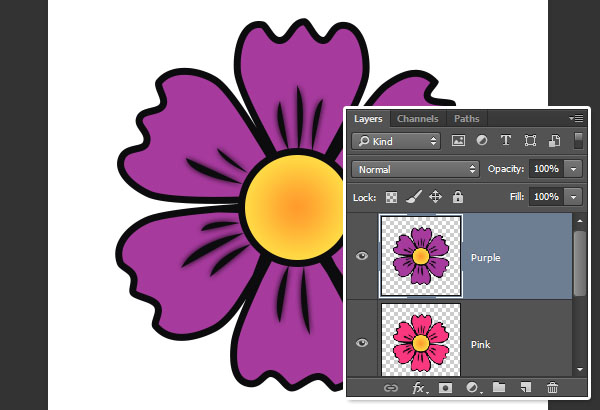
Duplicate the groups you have, and then, for each of them, right-click it and choose Merge Group. These are the layers that we will use to create the text effect later on.
6. Style the Leaves
Step 1
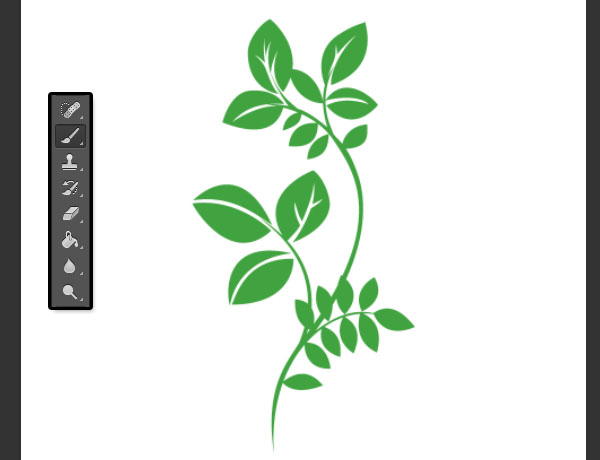
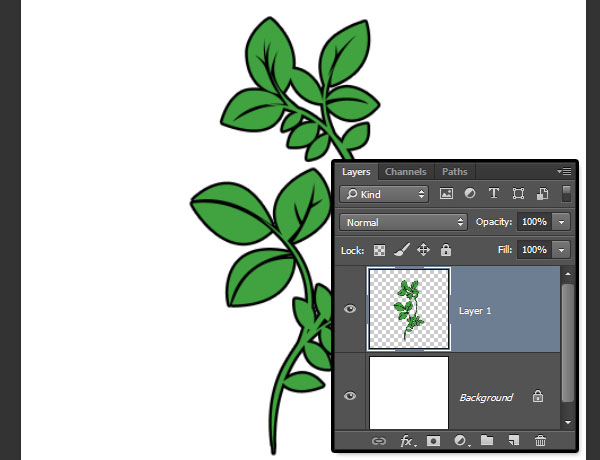
Create a new 1000 x 1000px document, and choose a leaves brush from the Floral Brushes 2 pack.
Set the Foreground color to #41a340, create a new layer on top of the Background layer, and click to add the brush.
Step 2
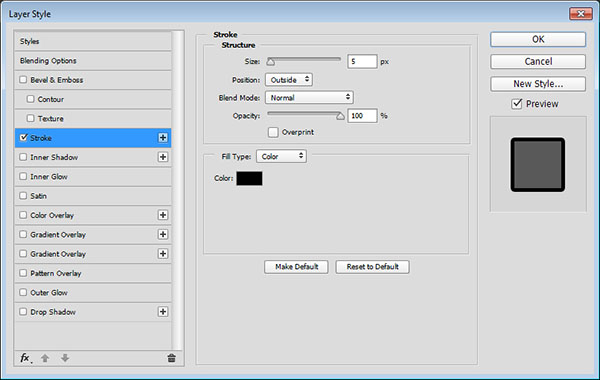
Double-click the brush layer to apply a Stroke effect using the following settings:
Size: 5
Color: #000000
Step 3
Right-click the styled layer and choose Rasterize Layer Style.
7. Create the Text
Step 1
Create a new 1024 x 845px document, and fill the Background with the color #372535.

Step 2
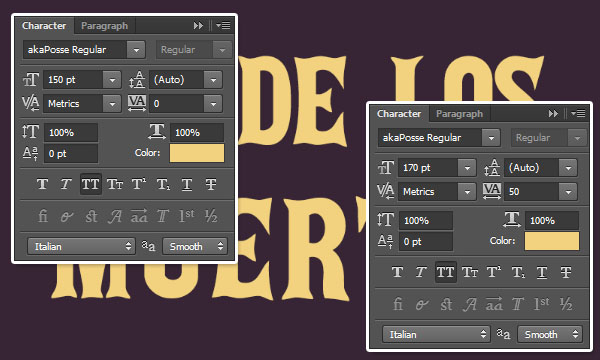
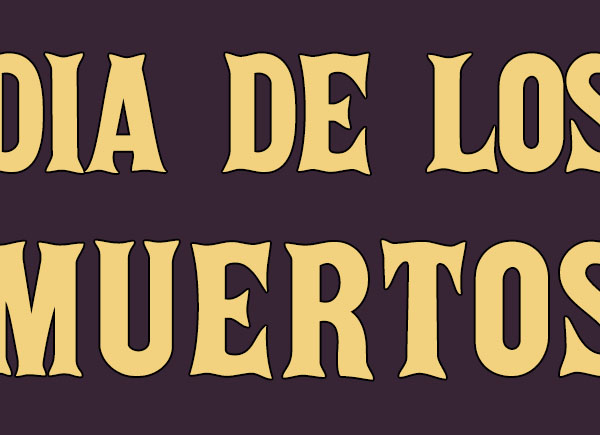
Create the Text in All Caps using the font Aka Posse and the Color #f2d27f.
The Size of the first line of text is 150 pt. For the second line, you will need to choose a slightly bigger Size—here it is 170pt—and set the Tracking value to something around 50.
Step 3
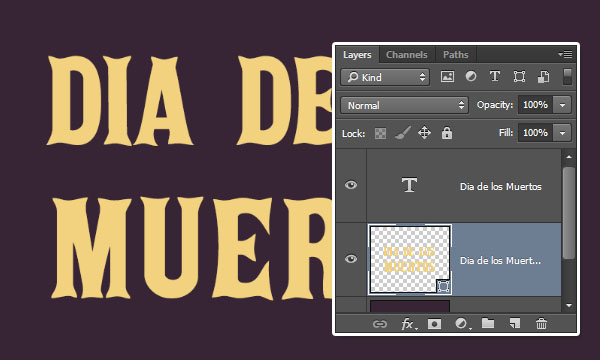
Duplicate the text layer, drag the copy below the original, and then right-click it and choose Convert to Shape.
Step 4
Double-click the original text layer to apply a Stroke effect using the following settings:
Size: 5
Color: #000000
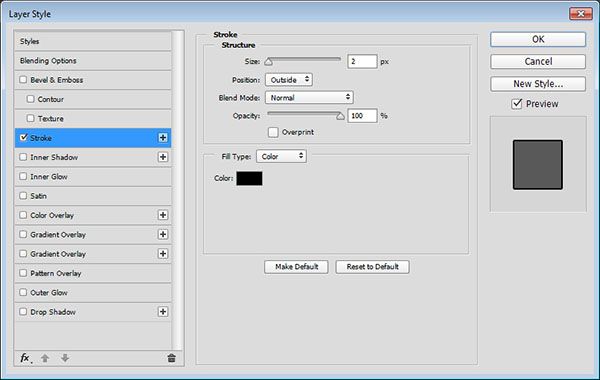
You might not see the stroke clearly now, but it will define the text when we apply the other strokes later on.
8. Create the Shape Layer's Stroke
Step 1
Select the text shape layer and pick the Direct Selection Tool.
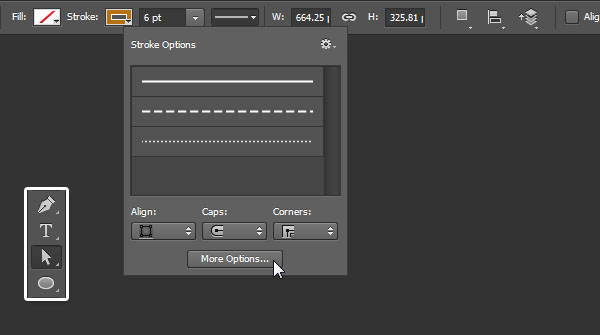
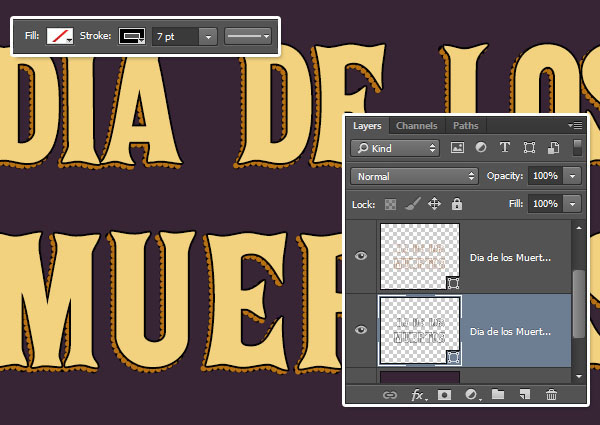
In the Options bar, change the Fill to None, the Stroke Color to #b77113, and its Size to 6. Then click the Set shape stroke type icon and click the More Options button.
Step 2
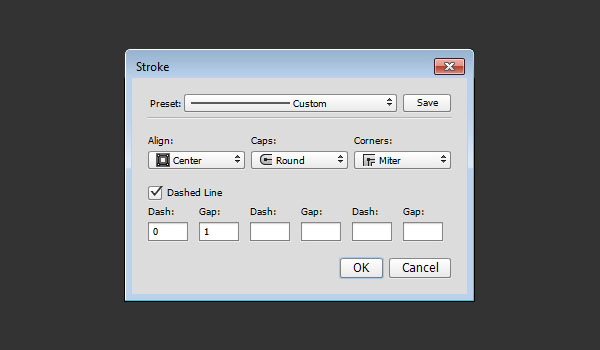
Change Align to Center, Caps to Round, Corners to Miter, and check the Dashed Line box. Change the first Dash value to 0, and the first Gap value to 2.
Step 3
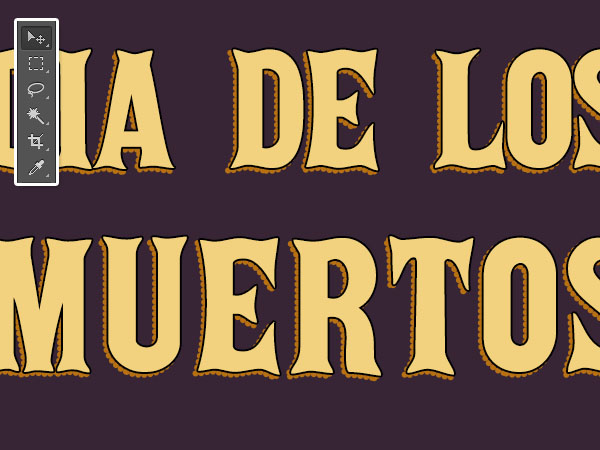
This will create a dotted stroke. Use the Move Tool to nudge the dotted stroke a little bit down to the left side.
Step 4
Duplicate the dotted stroke layer, place the copy below it, and then change the copy's Stroke Color to Blackand its Size to 7.
9. Add the Flowers and the Leaves
Step 1
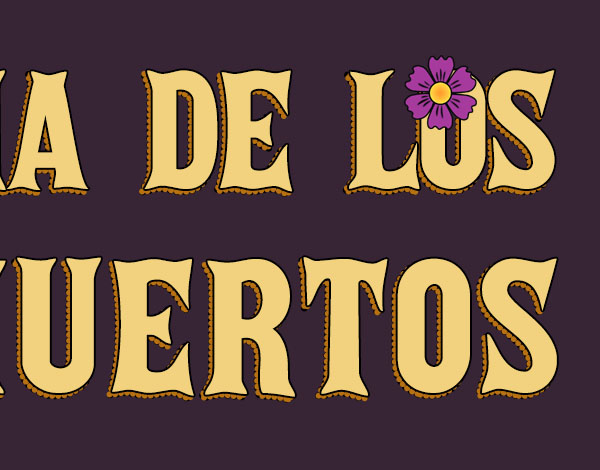
Duplicate the purple flower's layer to the text's document, and resize it as needed.
Step 2
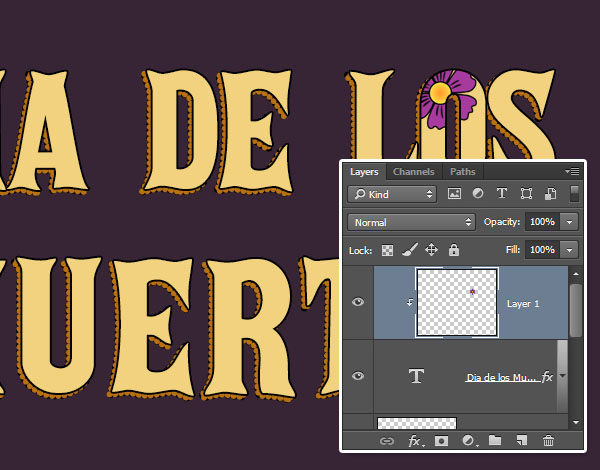
Right-click the flower's layer and choose Create Clipping Mask.
Step 3
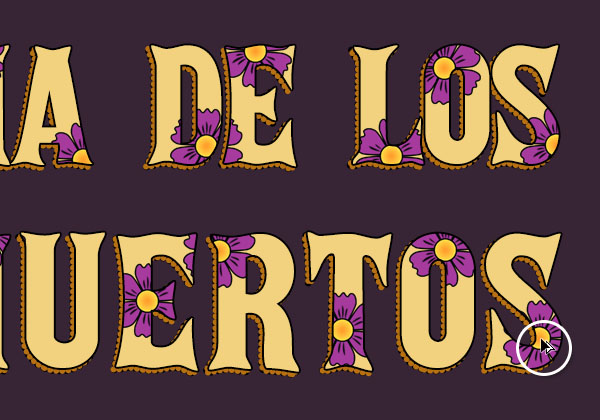
What you'll need to do next is select the Move Tool, press and hold the Option key, click-drag the flower and then release, to duplicate and move it over the text.
Keep in mind that you can only duplicate the flower in the selected layer, and that you need to leave some space for the pink flowers and the leaves.
Step 4
Follow the same steps to add in the pink flowers.

Step 5
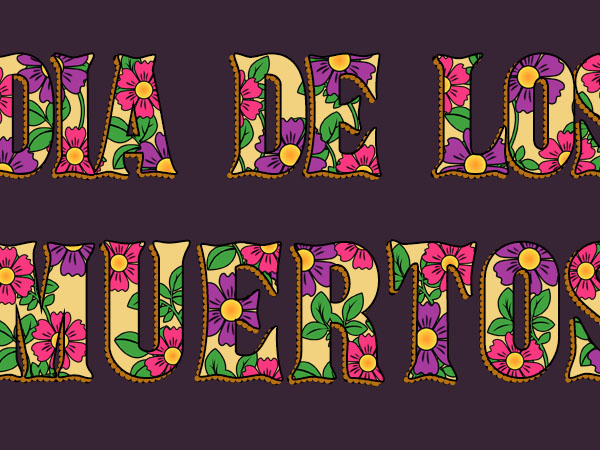
Then follow the same steps again to add in the leaves. Make sure to place the leaf layers below the flower layers.
If you like, you can resize and rotate the added elements to make the outcome more dynamic.
10. Add the Grunge Texture
Step 1
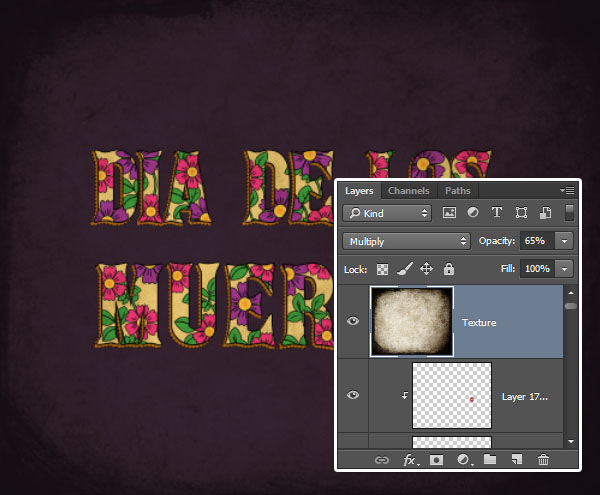
Place the Grunge image on top of all layers, resize it as needed, change its layer's Blend Mode to Multiply, and set its Opacity to 65%.
Step 2
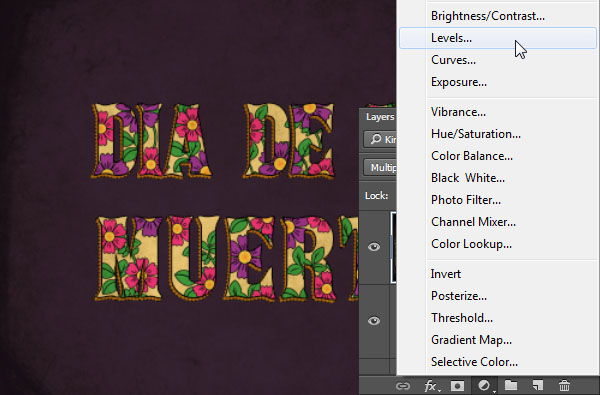
Click the Create new fill or adjustment layer icon at the bottom of the Layers panel and choose Levels.
Advertisement
Step 3
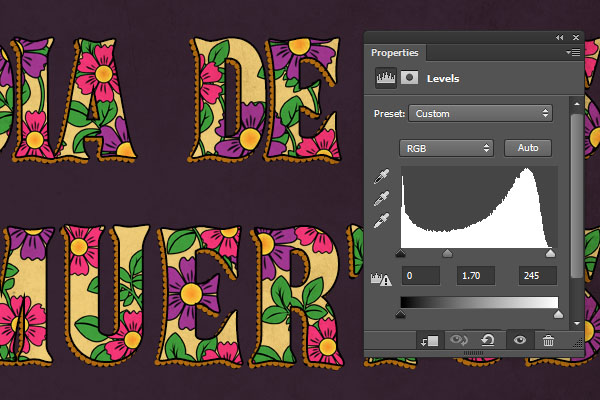
Click the Clip to layer icon, and change the Highlights value to 245 and the Gamma value to 1.70. This will brighten up the texture a little bit.
You can play around with the shapes, colors, and sizes to create many different outcomes.

Congratulations! You're Done
In this tutorial, we used a couple of shape tools to create a simple marigold flower, and we colored and styled it.
Then we styled a simple leaf brush, and rasterized the layers to use them on top of the text.
After that, we created the text, made shape copies of it, and styled those layers with different strokes to create the outer edges.
Finally, we filled the text with the flower and leaf layers, and added a simple grunge texture to finish the effect off.


