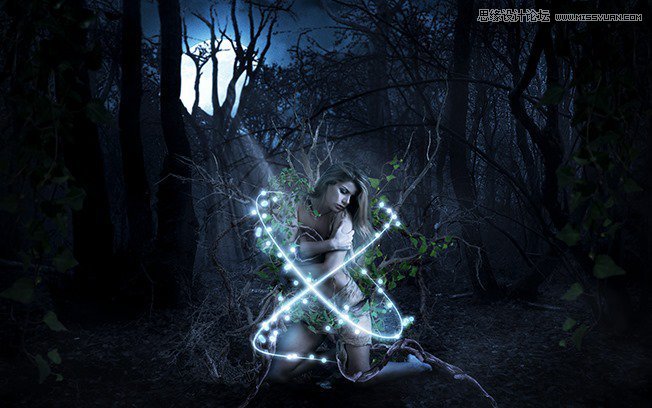
Photoshop合成被树妖困住的女孩【英】
来源:photoshoptutorials 作者:ANTAKA NGUYEN
This tutorial will show you how to create a dark, mystic photo manipulation. Along the way you will learn some interesting tricks and techniques such as working with tree branches and ivies, advanced blending and coloring techniques. Lets get to it!
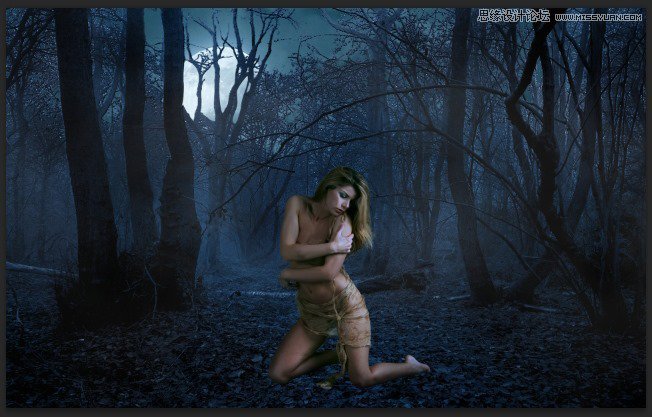
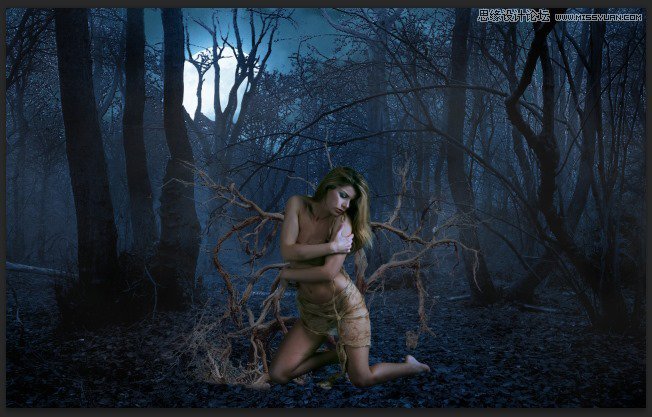
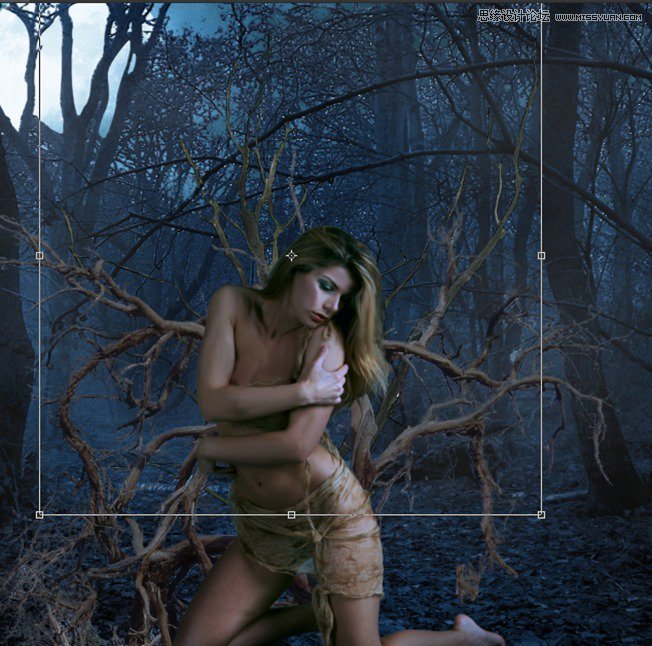
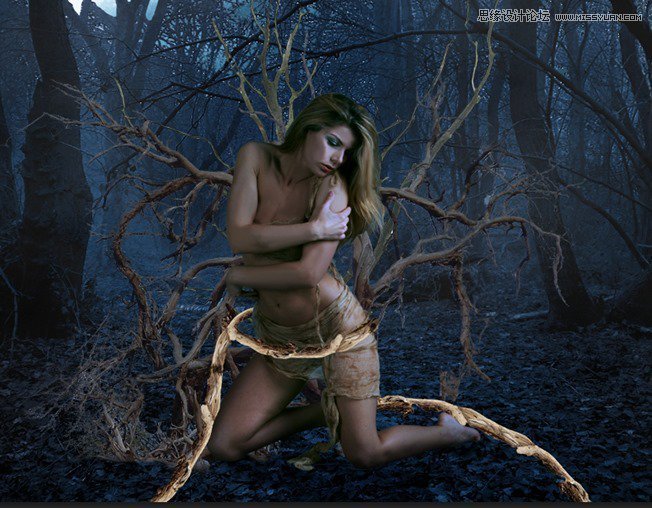
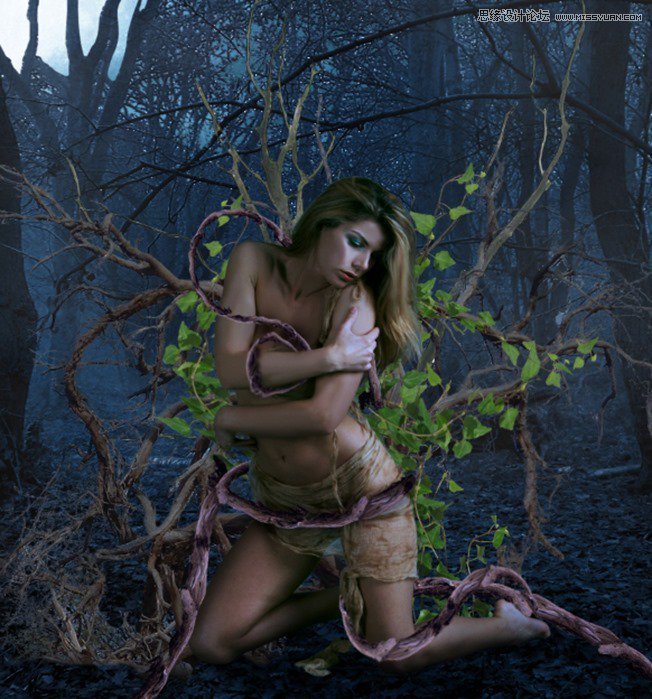
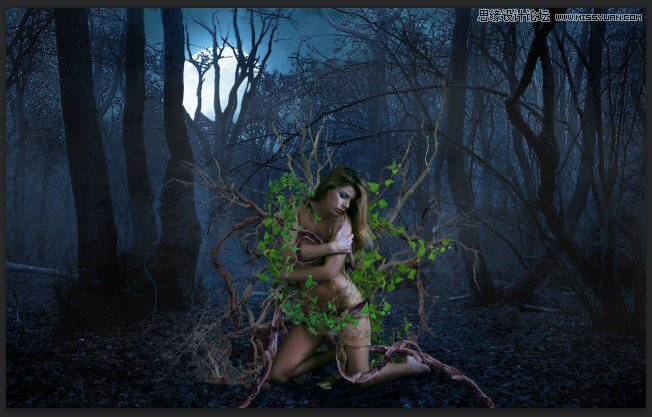
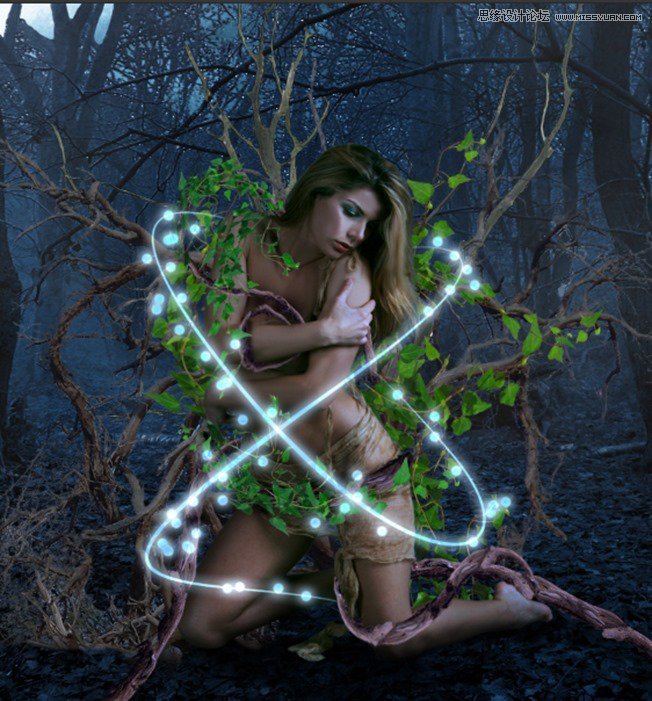
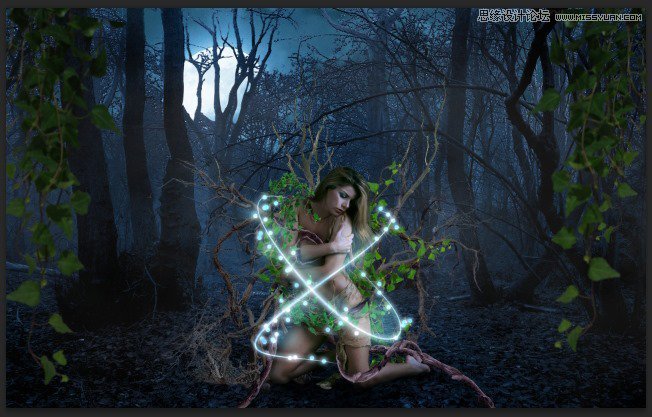
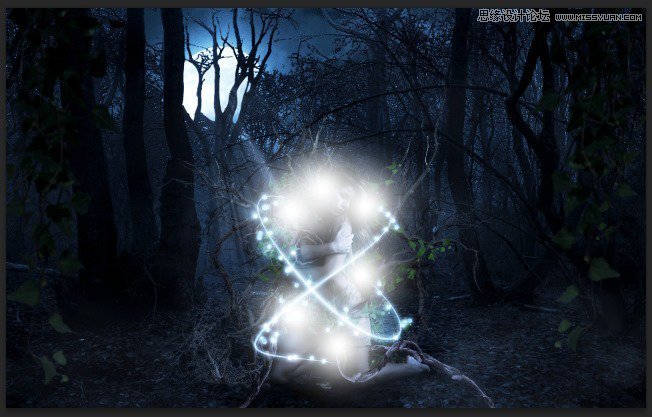
Preview of Final Results
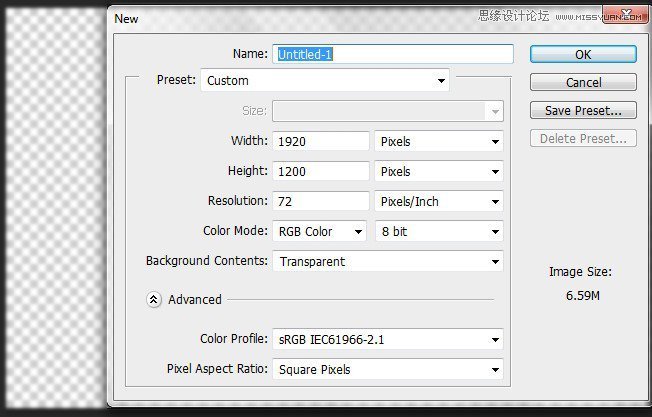
Step 1 – Create A New Document
Create a new document with the following attribute : Width 1920 – Height 1200| Background Contents : Transparent.
Step 2 – Extract The Forest
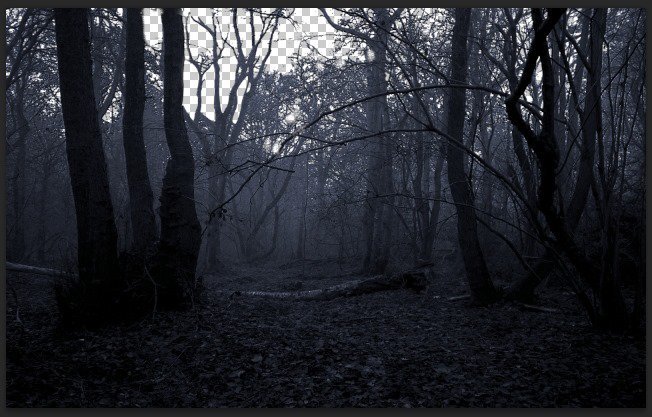
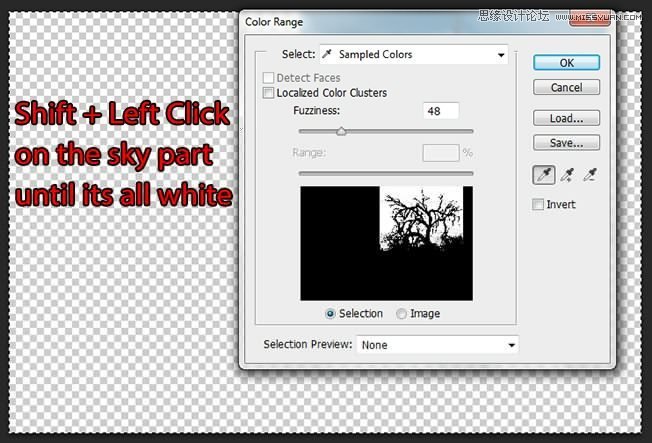
Open the Forest stock image. As you can see we want to create a mystic and dark piece so we can’t leave the bright sky like this, so we will get rid of it instead of trying to turn it dark. Select all the image with Ctrl + A then go to Select -> Color Range…
Hold Shift and left click on the sky part of the image until all the forest part are turned to black. You can adjust the Fuzziness for more accurate selection but I recommend keeping it below 80, as keeping high Fuzziness will cause Photoshop to select unnecessary part.
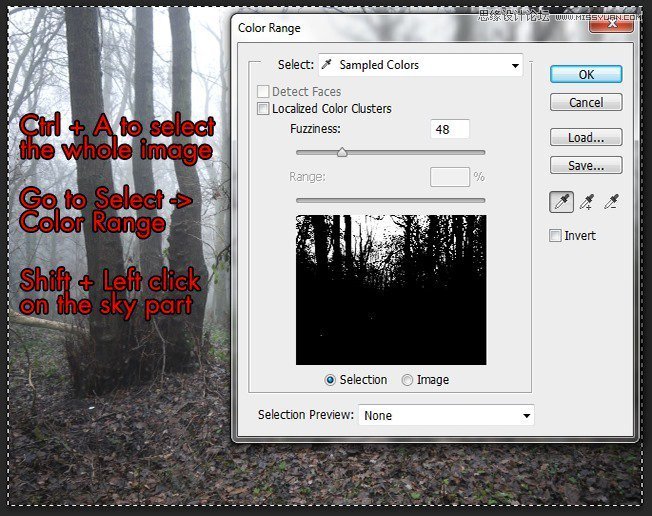
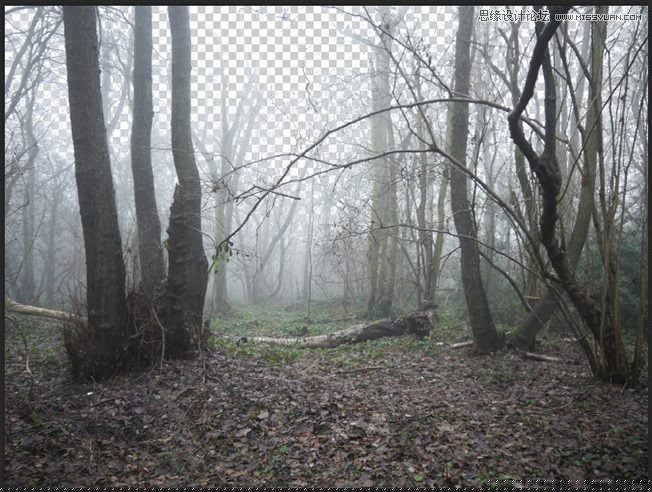
With the help of Color Range the forest has been extracted easily. This tool is a great choice for extracting detailed composition such as forest, trees, hair.
Step 3 – From Day to Night
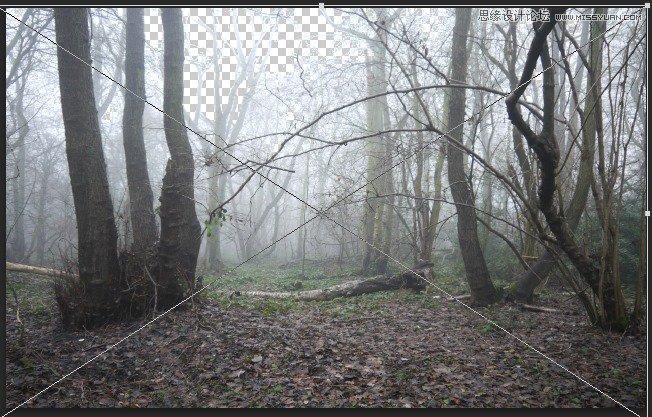
Bring the extracted forest into our document. Resize it like the image below.
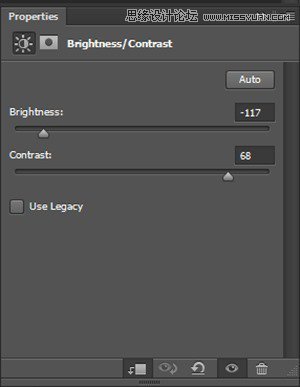
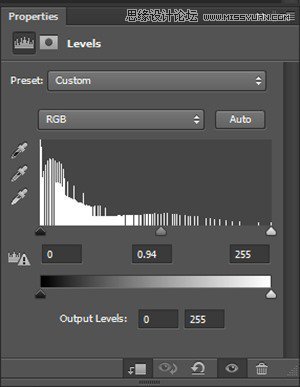
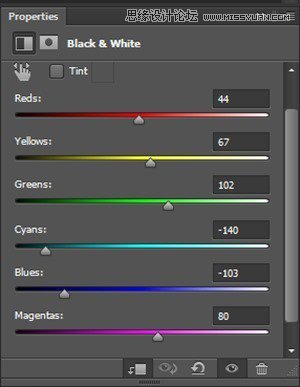
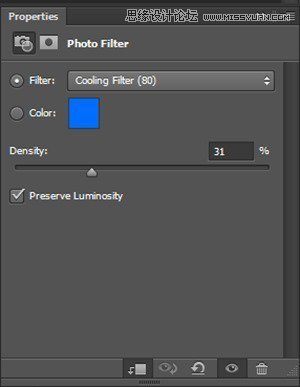
Begin adding this chain of Adjustment Layers to the forest. Remember to tick Create Clipping Mask on those adjustment layers so that they will only affect on the forest layer.
Brightness/Contrast -> Levels -> Black&White -> Photo Filter.
And here is the result :
Step 4
We need to add some extra shadow in order to fully turn our forest into a dark forest. Create a new layer, grab a soft brush with Black color and paint on these parts
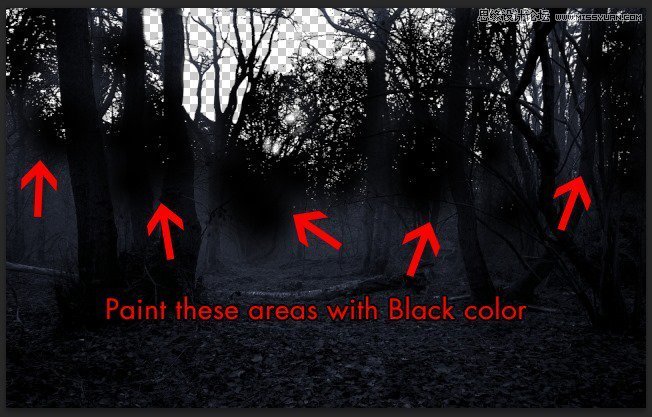
Switch the Blend Mode to Soft Light and low down the Opacity to 75%

Step 5
Dark blue is the main theme we want for our piece so we will begin to fill in the base color for the forest. Go to Layer -> New Fill Layer -> Solid Color then choose the color #4273b0, change the Blend Mode to Color with 77% Opacity, 78% Fill. By this simple step the forest will be blended with a nice dark blue color.
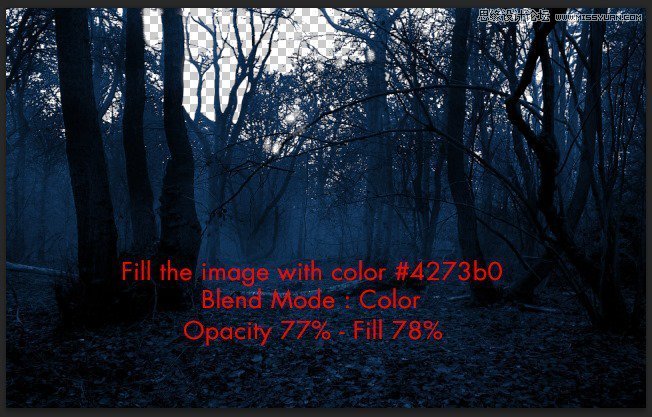
Add some Layer Mask to the Solid Color layer as some parts turned way too much blue than we needed.
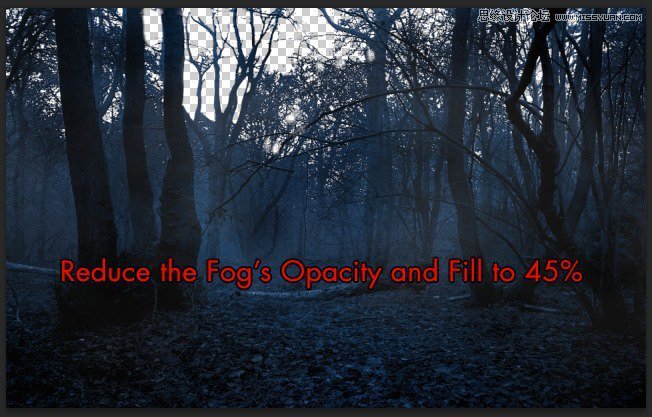
Step 6 – Adding Base Fog
Download the Fog Brush in the Resources list, open it and grab any fog brush you want and start painting.
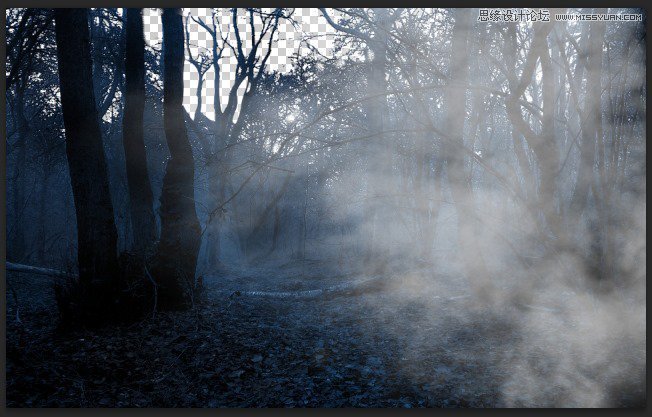

Layer Mask on these fog layers as we only want some subtle fog effect to spice up the atmosphere of the image.

Reduce the fog layer Opacity and Fill to 45%. The number can be changed as you desire, depends on how strong you want the fog to be.
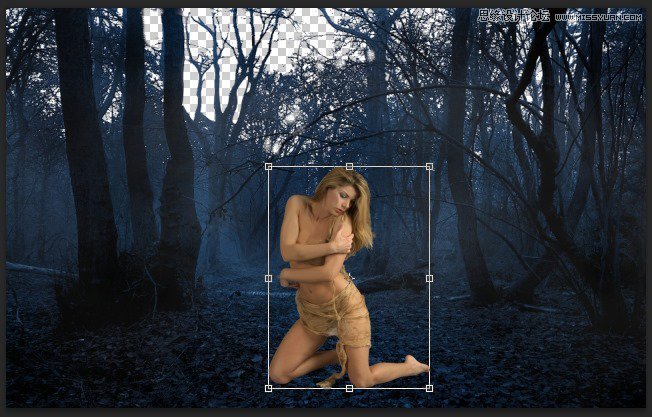
Step 7 – Extracting The Model
Open the Model stock photo and start extracting her, you can use Quick Selection Tool to do so as the photo’s quality is high and the contrast is enough for Quick Selection Tool to do its work. Otherwise you can use Pen Toolfor a better result but more time-consuming, its up to you!
Place the model into our document after you’ve done the extracting.
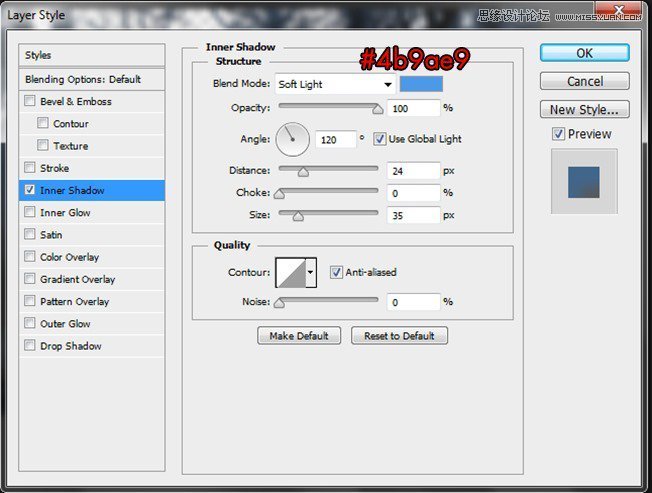
Step 8 – First Model Blending Process
Access to the Model’s Blending Option -> Inner Shadow and adjust the attribute like this :
Continue adding these following adjustment layers :
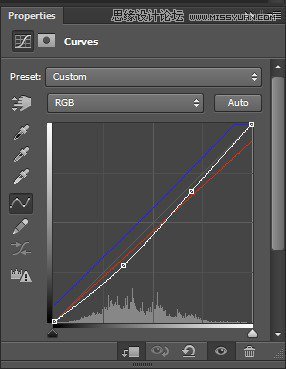
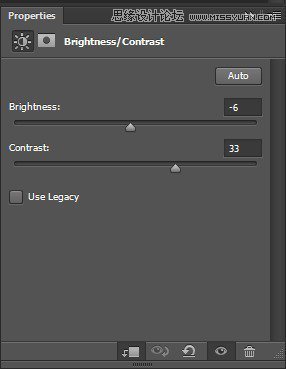
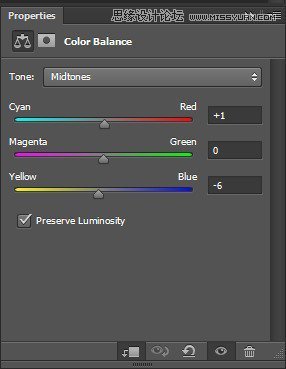
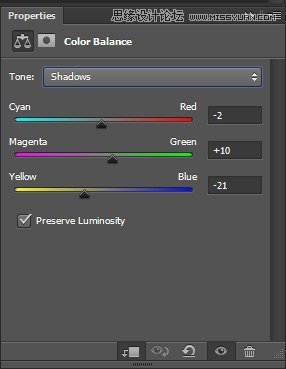
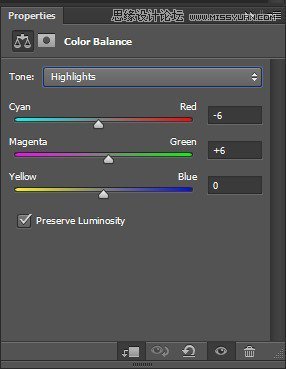
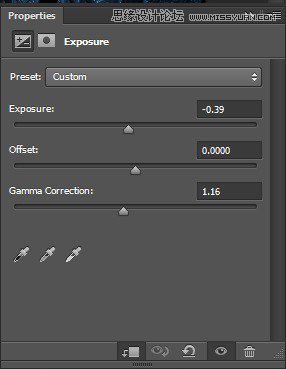
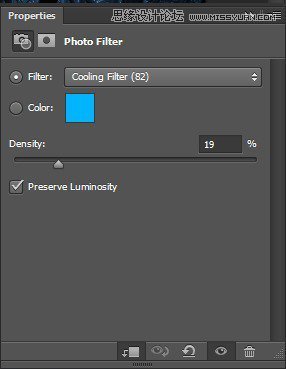
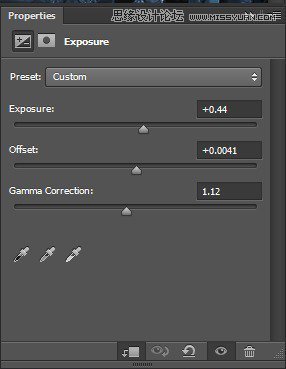
Curves -> Brightness/Contrast -> Photo Filter -> Color Balance -> Exposure

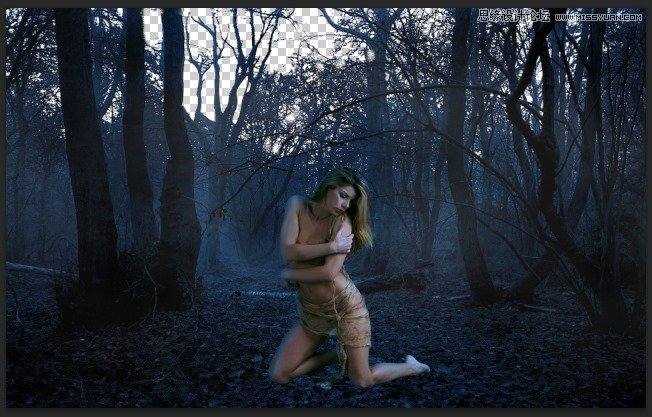
And here is the result :
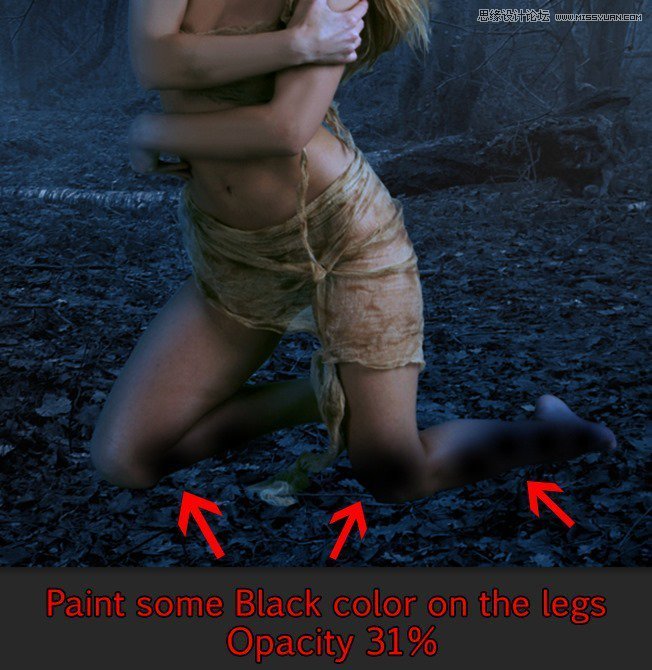
Step 9 – Adding Shadow To The Model’s Legs
We will use the same method we just did with the forest to the model’s legs in this step. Reduce the Opacity to 31%.
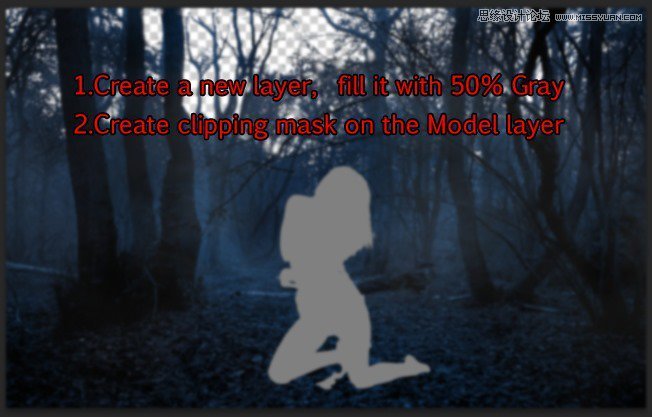
Step 10
As you can see the Model’s base lightning is not really fit with our image. Normally it would take many adjustment layers to fix this but the result won’t be good. With this step I will show you this good trick to adjust the lightning as you want with the help of Dodge and Burn Tool.
First you need to create a new layer and fill it with 50% Gray. Do so by hit Ctrl + A to select the layer, right click on the screen and choose Fill -> 50% Gray. Create Clipping Mask on the Model layer.
Grab the Dodge and Burn Tool, keep the setting as Midtone with 12% Exposure. Start painting on the model. Notice that the light source we will create later will come from the top so use the Dodge Tool to highlight the parts where the light sources will possibly touch the model, and Burn Tool to darken the other parts.
As in the image, red arrows indicate where to use Burn Tool, blue arrowsindicate where to use Dodge Tool.

Change the Blend Mode to Overlay and see the result!

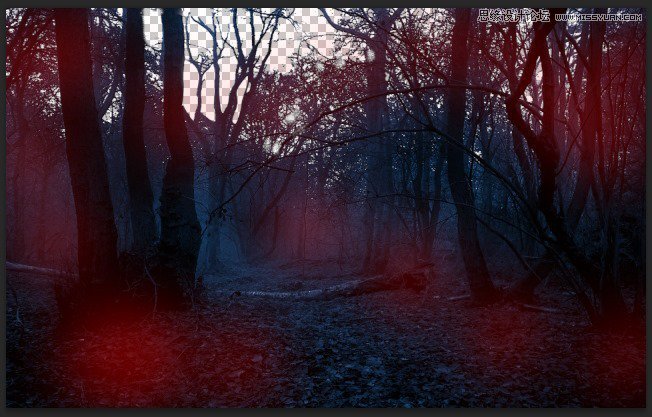
Step 11 – Adding The Sky
Place the Sky stock photo into our document, behind the forest.
Add the Curves adjustment layer to the sky.
Step 12
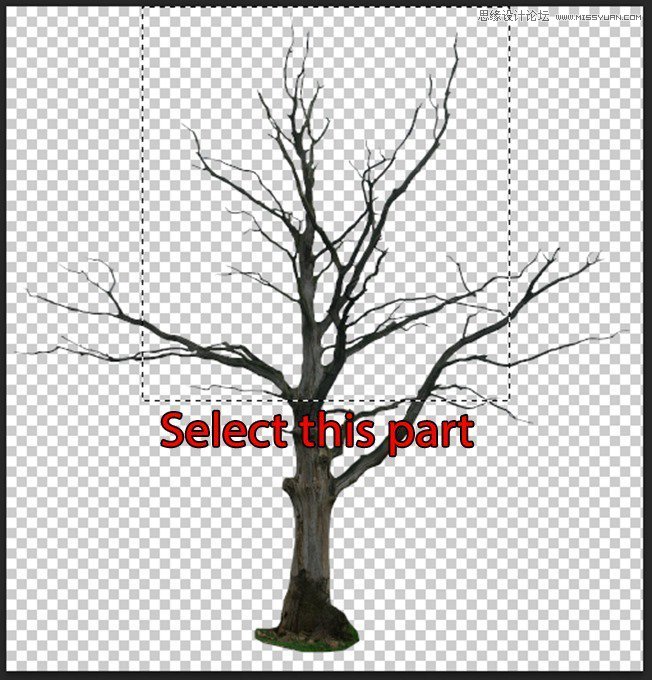
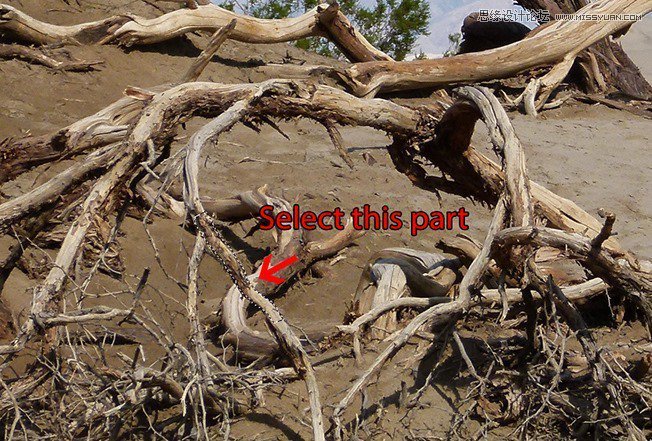
Open the Dead Tree 1 stock photo and select this specific part. Use Color Range to extract it as we did with the forest in step 2. This is a very good chance to try out this tool.

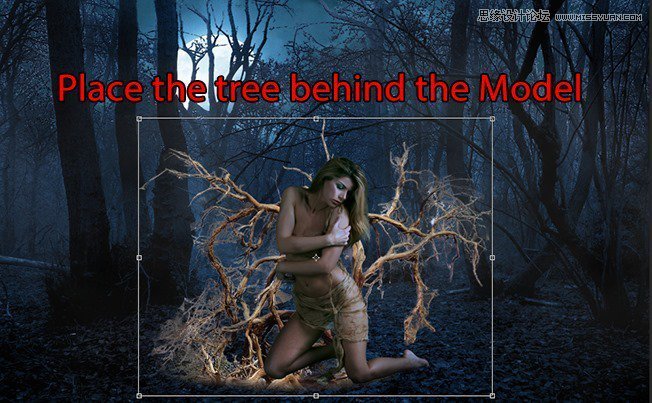
Step 13
Place the extracted dead tree behind the model.
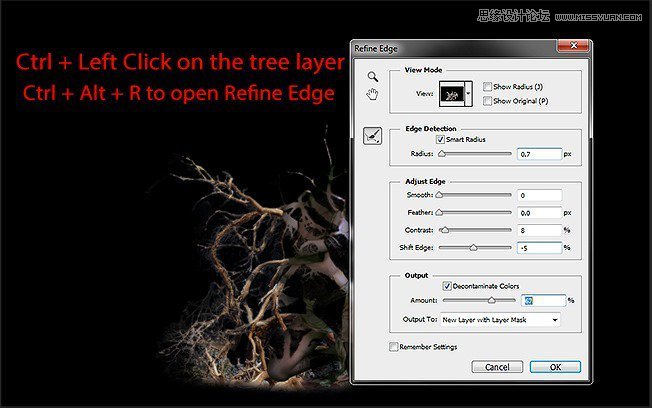
We don’t want those white pixels remain on the dead tree so we will seek the help of Refine Edge to get rid of these annoying thing. Select the dead tree by Ctrl + Left Click on its layer and hit Ctrl + Alt + R to open Refine Edge.
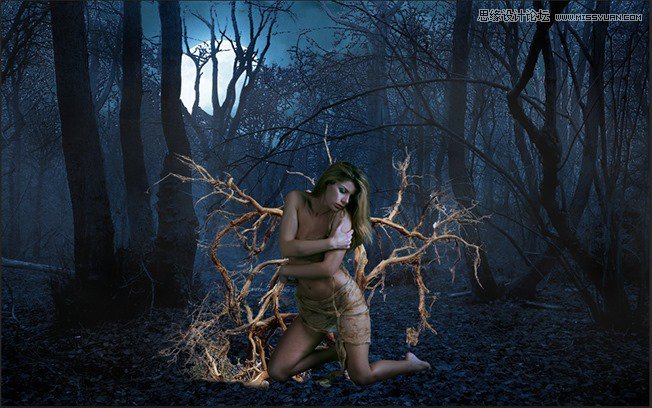
Just with a few tweaks, the white pixels are gone!
Step 14
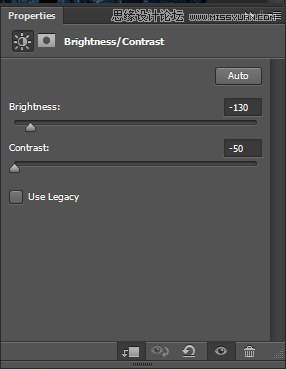
Apply following adjustment layers to the dead tree.
Brightness/Contrast -> Exposure -> Photo Filter
Here is the result
Step 15
Open the Dead Tree 2 and extract the following part
Place it behind the model.
Add an Exposure adjustment layer
And we have some extra dead tree for the girl!

Step 16
This is a very interesting step and I recommend you try it out by your free will. We will make the model being tangled by the dead tree’s branches. Open the Dead Tree 1 stock again and get any piece of branch you want. For example this one
Paste it to our document, right click on its layer and choose Convert To Smart Object, by this way we can transform the branch freely without fearing the quality reduction.
Now you can bend, twist the branch at your free will. Hit Ctrl + T to bring up the Transform tool, right click to choose the option. In this picture I use Warp to bend the branch.
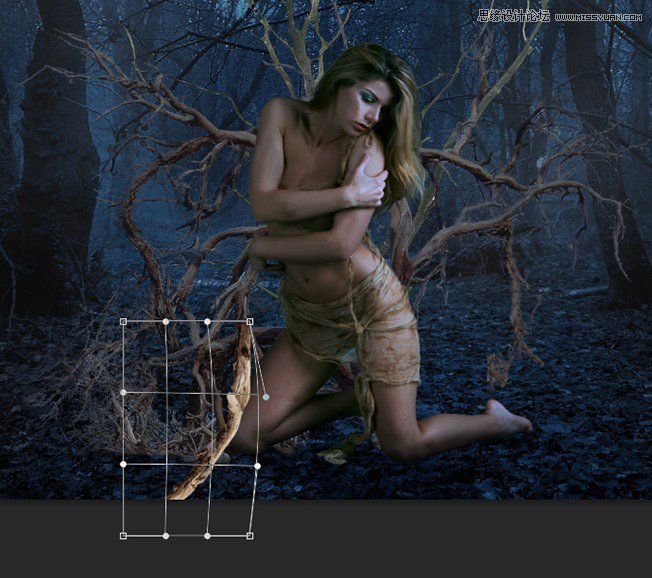
Continue duplicate and bend the branches. Make them twist around the model.
Step 17
Continue creating twisted branches as many as you like, just don’t overdo it.
Create a new layer and paint some shadow to the part which the branches are on the model. Change the Blend Mode to Overlay.
Step 18
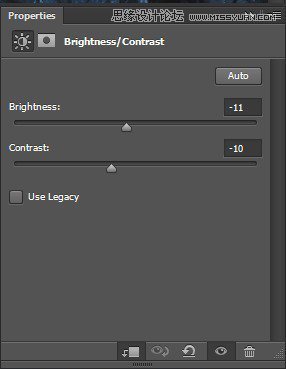
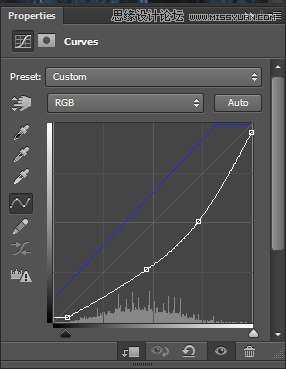
Group all the branch layers into one group (Hold Shift and Left Click on the branch layer at the top then click the branch layer at the bottom of the list to select all of them, Ctrl + G to group). Apply these adjustment layers to the group.
Brightness/Contrast -> Curves
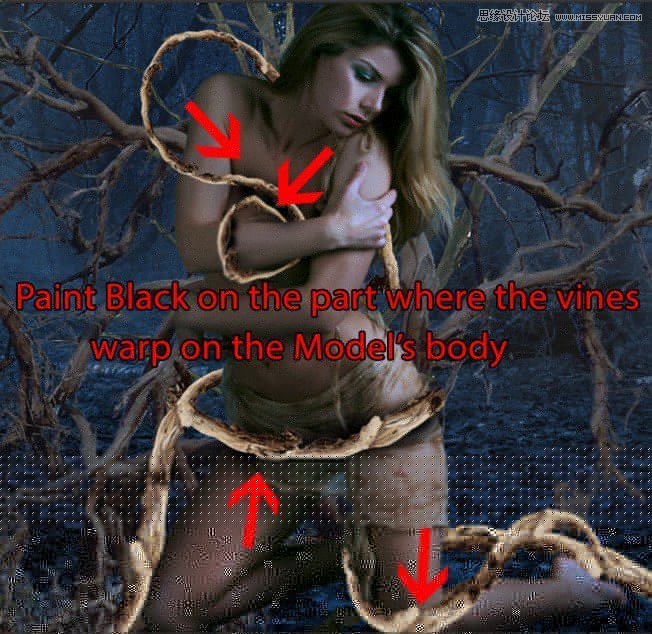
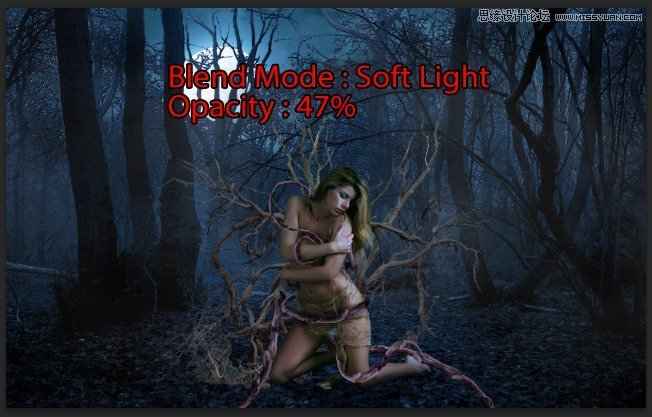
Also we want some extra shadow on those branches so create a new layer, Create Clipping Mask with the group and paint some black on the branches.

Change the Blend Mode to Soft Light, Opacity 47%
Step 19
Create more shadow at the bottom of the model and the branches on the ground with Black soft brush.
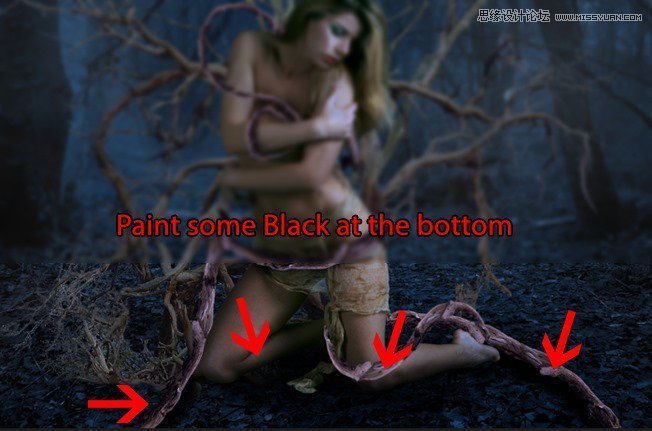
Opacity 45%

Step 20
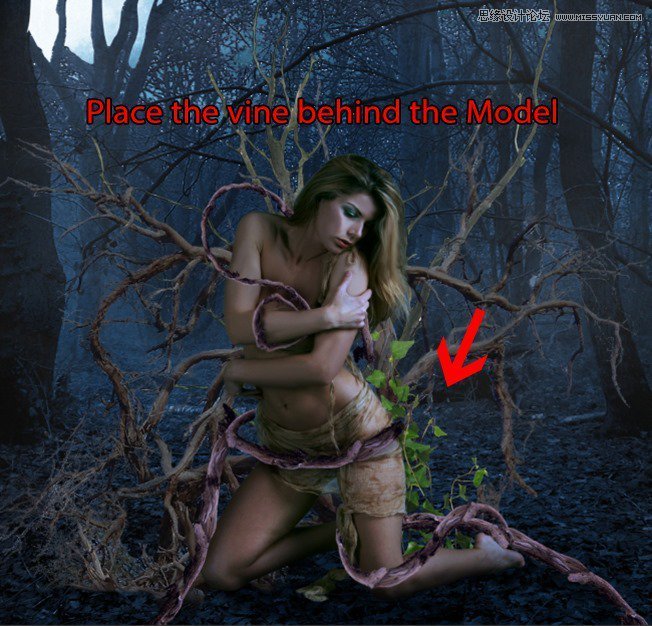
We had fun with the branches, now its time to have fun with ivies. Open the Ivy stock which has been rendered nicely for you to use. Place it behind the model.
Place more and transform them as your will as well. The more the merrier! Make them follow the branches.
Step 21
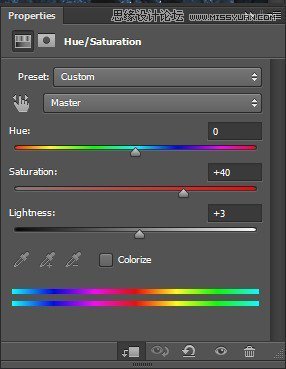
Add this Hue/Saturation adjustment layer to the ivies. Group them into one before doing this!
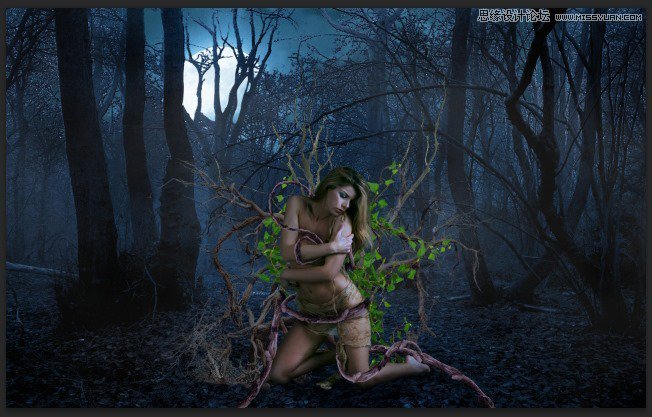
Our result so far.
Step 22
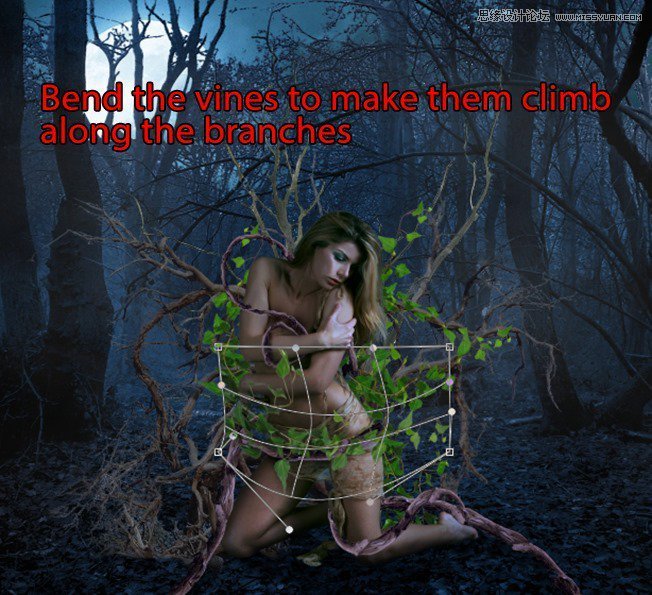
Bring more ivies to the front of the model and make them follow the branches on her body.
Step 23
Similar with step 21, add a Hue/Saturation adjustment layer to all the ivies at the front.

Step 24
With the appearance of the branches and ivies, we will need to some extra shadow to the ground since the current shadow is a little weak.
The method is similar to the way we create shadow in the previous step. Change the Blend Mode to Soft Light.
Step 25
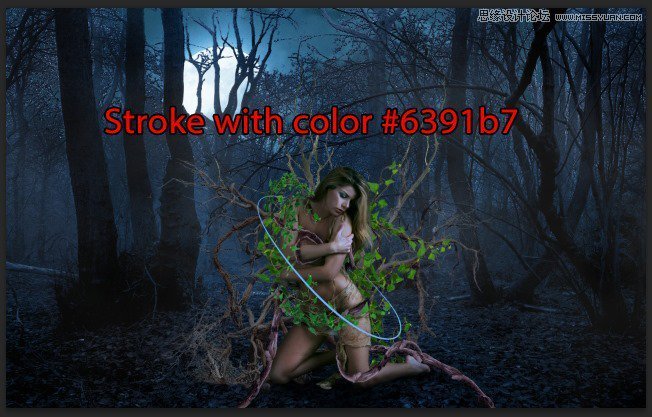
Now we will create a simple yet special effect for the model so the piece looks more…magical. Create a new layer , grab the Pen Tool and draw a curve line around her body like this :
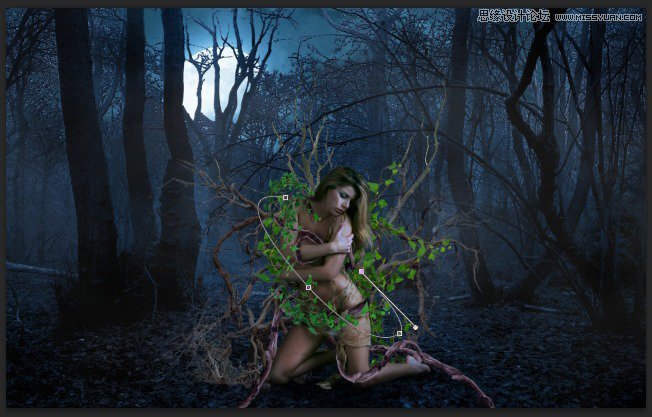
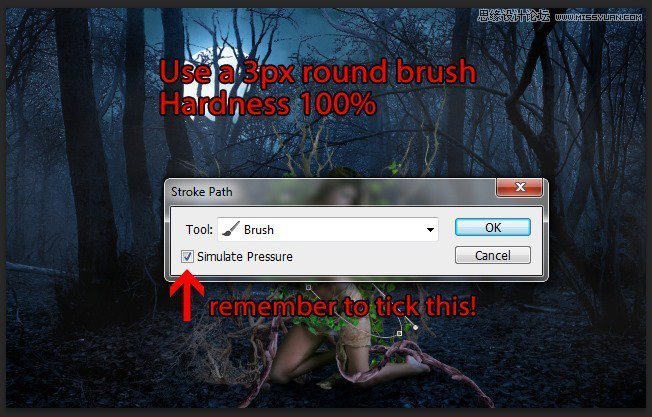
Before continue please go to the Brush Tool, choose a 5px round brush with 100% Hardness.
Back to the Pen Tool, right click on the curve line you just drew and chooseStroke Path. Choose Brush as Tool, tick on the Simulate Pressure.
The Stroke Path option will use your Foreground color as the stroke color so set the Foreground color as #6391b7 then click OK. Here’s what we will have :
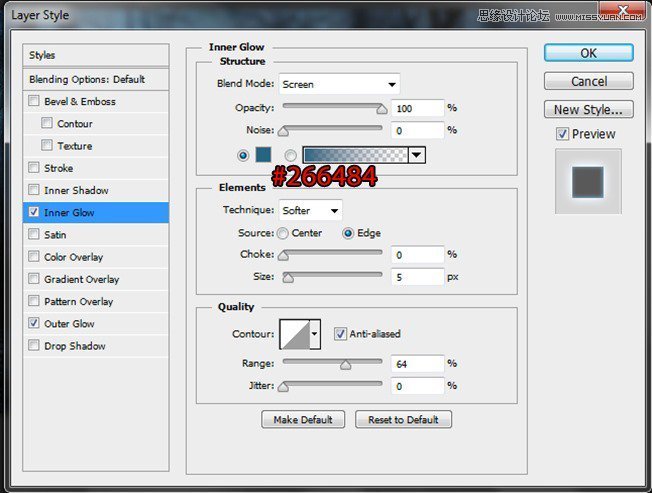
Step 26
Apply these setting for the Curve Line layer’s Blending Option :
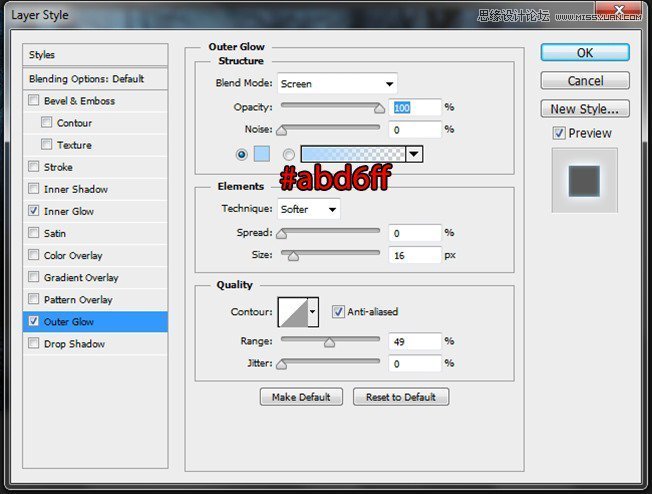
Change the Blend Mode to Linear Dodge and we will have a nice glowing line!
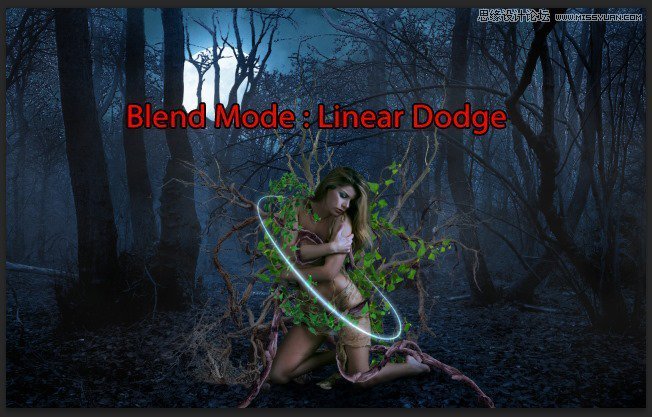
Do the same with another line.
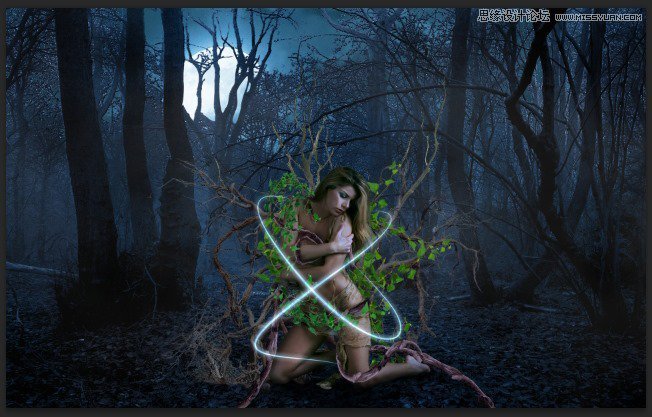
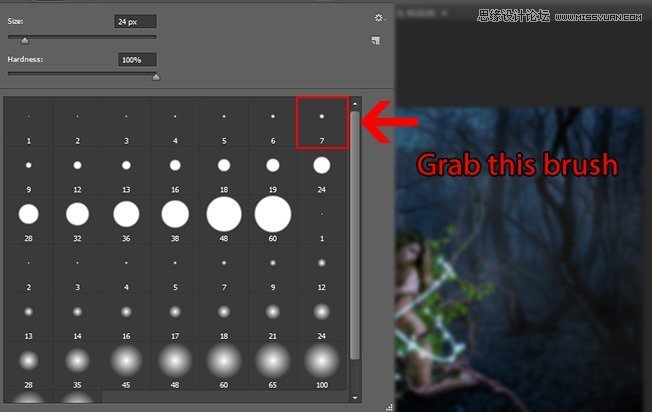
Step 27
Create another new layer, use 7px round brush, 100% Hardness.
Open the Brush Panel (shortcut : F5) and adjust the setting like this :
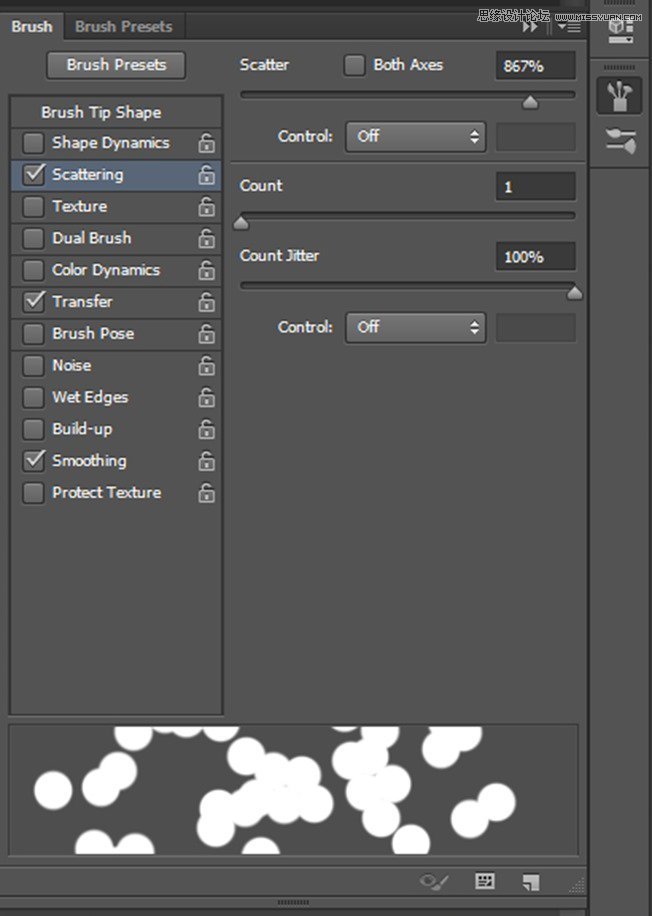
Now paint around the model, with the setting we just had, the round will be scattered as we paint, create a bokeh-like effect. Apply the same Blending Option and color like we did with the Curve Lines.
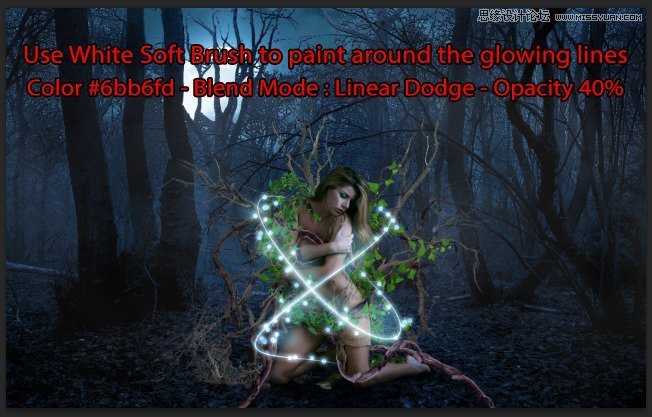
Step 28
We would want to add an extra light to increase the effect we just made. Use a soft brush with color #6bb6fd and paint around the model, change the Blend Mode to Linear Dodge and Opacity 40%
Step 29
Open the Ivy stock again and place it at the top left of the image. Apply a 1,6px Gaussian Blur.

Duplicate the ivy, resize it a little bit and place it behind the original ivy.

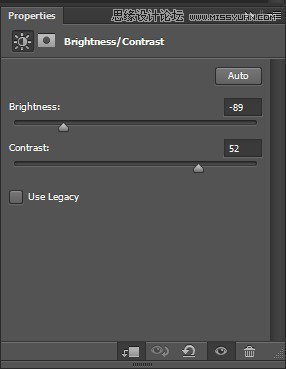
Group those ivy layers into a group and apply this Brightness/Contrast :
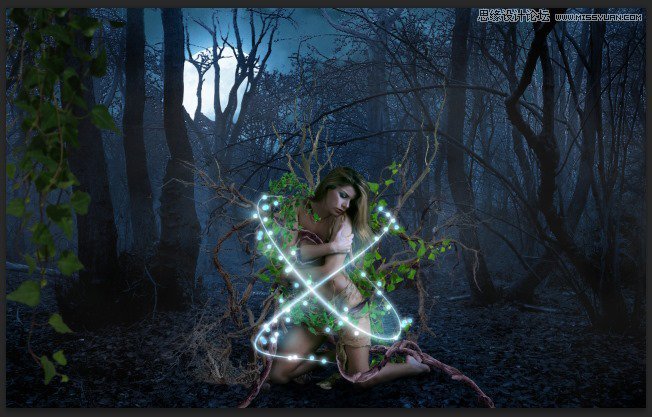
Done with the left!
Step 30
Now we just need to make one more ivy set at the right, duplicate the Ivy group we just created and place them to the right. Ctrl + T to open Transform Tool and choose Flip Horizontal so the ivies doesn’t look similar to the left one.
Step 31
We are almost done! Add some more fog to increase the mystic atmosphere for our piece.
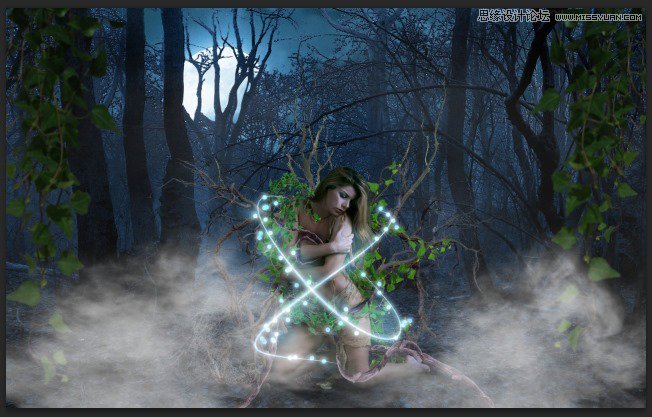
Layer mask to the fog.

Here is the result.
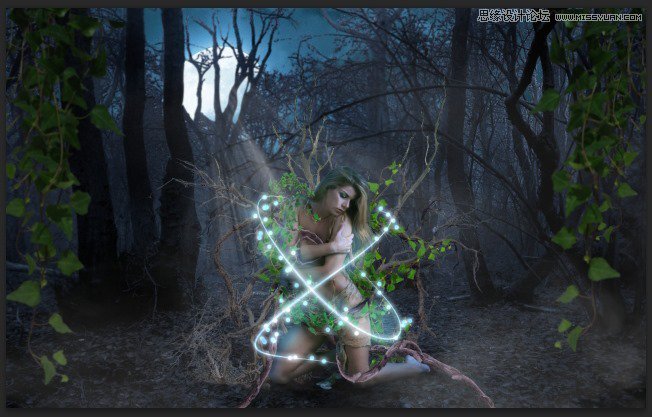
Step 32
Now one the Ray Light brush, piece a brush you like and place it near the moon. Low down the Opacity if you feel the light is too much.
Step 33
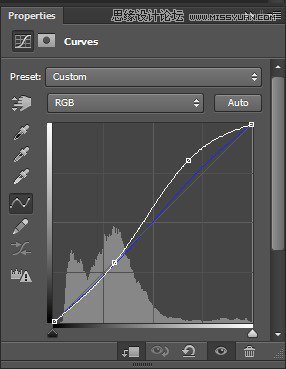
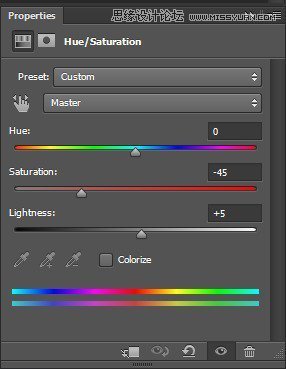
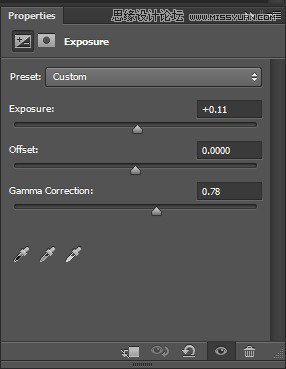
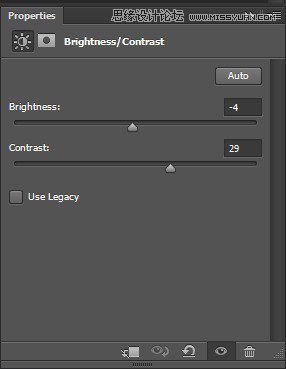
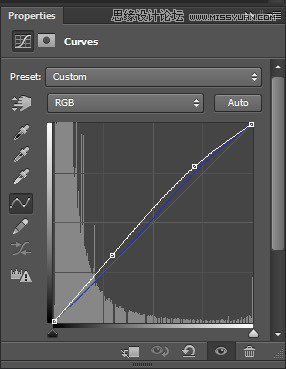
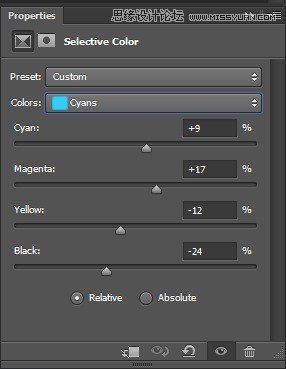
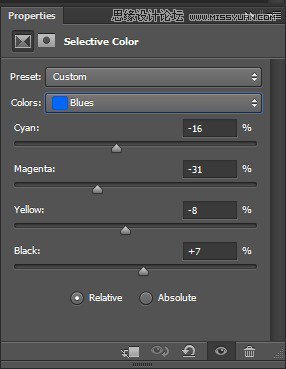
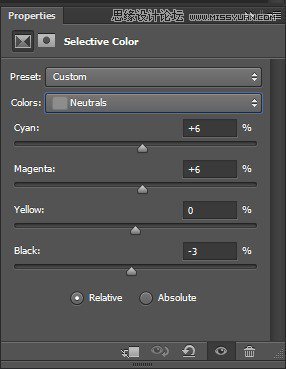
Now to the final color tune up. This following chain of adjustment layer will do its magic!
Hue/Saturation -> Exposure -> Brightness/Contrast -> Curves -> Selective Color

The result :
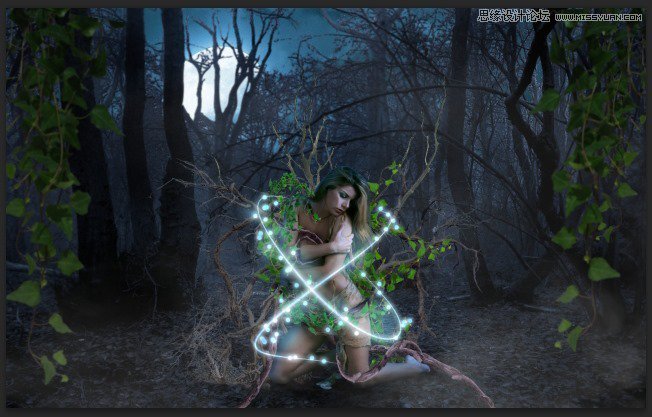
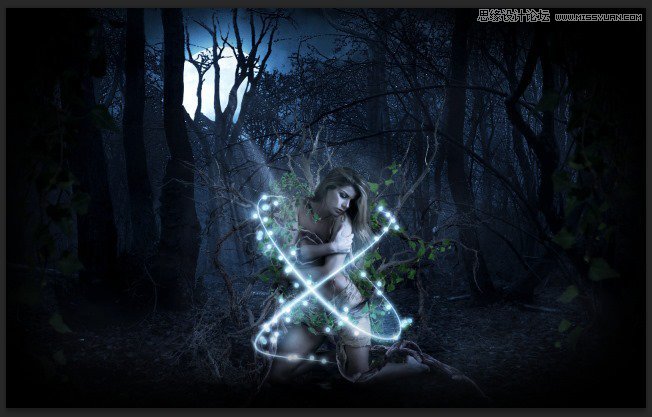
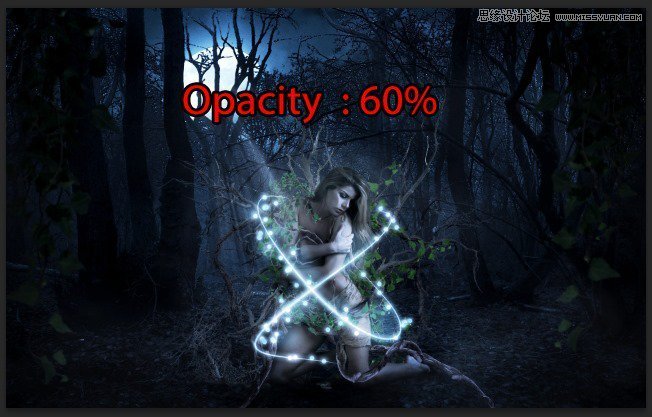
Step 34
Add some extra light to the model with a White soft brush.
Change the Blend Mode to Soft Light. Also grab soft brush with Black and paint around the edge.
Reduce the Opacity down to 60%.
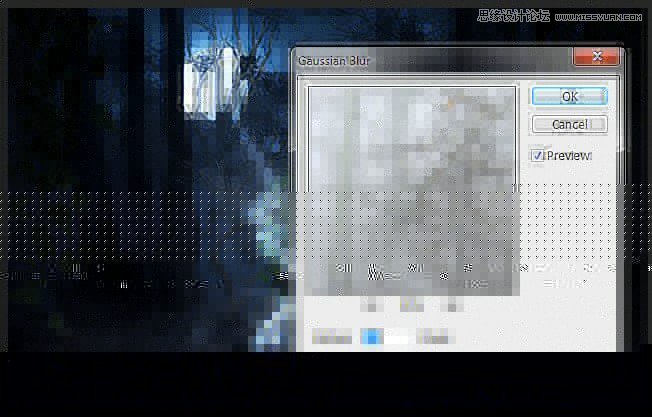
Step 35
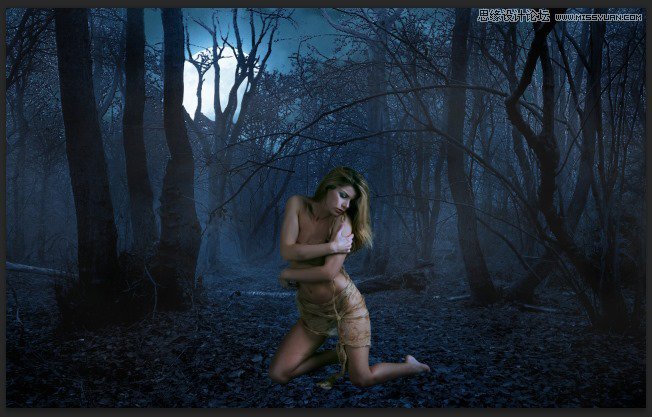
One last touch! A great way to bring up our main character is to make the background less attractive. Add this 1.2px Gaussian Blur to our Forest layer (remember to turn it to Smart Object!)
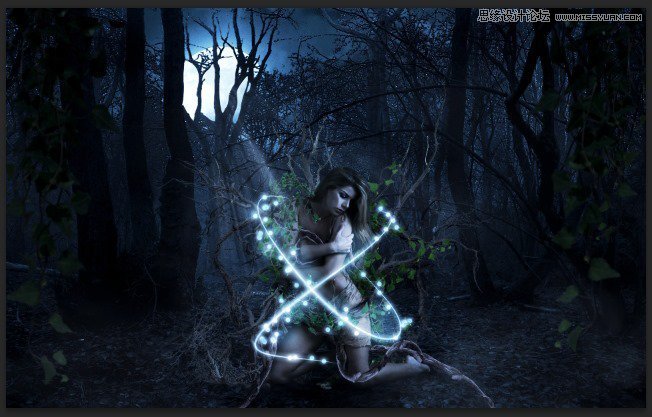
Final Results